
Some notes on installing and using Arch Linux
Summary
This post contains some notes I want to remember when installing and using Arch Linux. I will keep updating its contents as time goes by.
Note (2020-09-30): For a more secure system, I am now using Arch Linux with UEFI boot and full disk encryption.
- Install Arch Linux
- Packages and Configuration
- Rank Mirrors
- Desktop Environments
- Enable Networking
- Enable Printing Service
- Time Setting
- Archive Formats
- Packer/Yaourt/Pamac
- Theme
- Media Codecs
- Fonts and Keyboards
- Enable GDM
- Oracle Java & Eclipse
- Missing Firmware
- Downgrade
- (Vanilla) TeXLive 2017
- pdf2htmlEX
- ClamAV
- Docker
passpassword manager- SRWare Iron
- SageMath (compile from source)
- Vim
- Some other packages
- Backup/Re-install the installed packages
- More installations, configurations, and issues
- Error ``Pacman is currently in use, please wait’’
- Accessing
JAISToreduroamwifi in JAIST - Using JAIST’s SSL-VPN service
- Using Kyutech VPN
- Using KyotoU VPN
- VPN Gate
- Anjuta opens my folders
- Visual Studio Code (VS Code) opens my folders
- Auto reconnect Bluetooth devices at boot
- Pairing bluetooth devices on dual boot of Windows and Linux
- GnuPG
- Backup
$HOMEfolder withrsync - Full backup with
rsync - Error “Failed to start User Manager for UID 120. See
systemctl status user@120.servicefor details” - [Laptop] Cannot enable “Tap to click” function of a touchpad
- Change the directory where
cups-pdfoutputs printed files - Some tips when using
sudo - Backup/restore/reset GNOME settings with
dconf - Backup and restore wired/wireless/vpn/hotspot connections with NetworkManager
- Rollback/Restore a
pacman -Susytem update/upgrade withaura - Apache, MariaDB, PHP (LAMP stack), and so on
- FTP with
vsftpd - Turn your PC into a webserver
oh-my-zshdoes not apply themes- Automount NTFS USB drive with default Linux file permissions
- Copy contents of a file to clipboard
- IRC server
- Some tips with file timestamps
- Cleaning
- Quick Clonezilla commands
- [Live Arch] Adjust The Size of The Root Partition on Live Arch Linux
- Mondo Rescue
- Error 12 when using
zip -uinMakefile - Which package holds my program?
- Some tips for using
git - Convert BibTeX to RIS
- Some useful packages involving LaTeX
- Static HTML file index generator for Github Pages
- HiDPI Display Settings
- Mobile Broadband
- Drivers for HP Printer/Scanner/Fax Devices
- Drivers for Kyocera TASKalpha Printer
- Drivers for Fujifilm Apeos C320 z Printer
- Guake and Wayland
- Adwaita-Dark Theme and Solarized-Dark Highlighting Scheme in TeXstudio
- Hiding output of a command
- Finding files having certain string in their names and rename them
- Change default user directories
power-profiles-daemonpackage conflicts with TLP- Mailnag
- Configure
nanotext editor - Pop Shell
- Enable Hibernation into swap file
- BigBlueButton Presentation Renderer
- Import history from Vivaldi
Install Arch Linux
The official Arch Linux can be downloaded from https://www.archlinux.org/download/. If you are new to Arch Linux, it is better to install Manjaro Linux or Anarchy-Linux. The installation guide can be found at https://wiki.archlinux.org/index.php/installation_guide. Here, I describe how I install Arch Linux to my ASUS X44H laptop.
Create live USB of Arch Linux
I download the latest ISO from https://www.archlinux.org/download/ and create a live USB with that iso file.
In a Linux system, you can use the dd command
dd bs=4M if=/path/to/archlinux.iso of=/dev/sdx status=progress && sync
In a Windows system, my recommendation is Rufus or Ventoy. You can also remaster the install ISO.
Keyboard
I have the default console keymap (i.e., US), so I do not need to re-configure the keyboard layout. To list all available layouts, use
ls /usr/share/kbd/keymaps/**/*.map.gz
To set a layout, use loadkeys command.
Boot mode
To verify if your computer supports UEFI, use ls /sys/firmware/efi/efivars.
If the directory does not exist, your computer does not support UEFI.
In fact, my computer supports both UEFI and BIOS boot modes.
Internet connection
If you connect to the internet using wired network devices (as I do) then you can verify the connection (which is enabled on boot by the installation image) using ping command.
See this page for more details on how to configure a network connection.
Time settings
Use the command
timedatectl set-ntp true
to ensure the system clock is accurate.
Disk partitions
The command fdisk -l lists all available storage devices and its partitions.
Suppose that I install the system in /dev/sda.
To create/delete/re-size a partition in a storage device, I use cfdisk (DOS partition tables).
I created three partitions /dev/sda1, /dev/sda2, and /dev/sda3 for /, /home, and swap, respectively.
It is recommended that if you have less than 1GB RAM then you should spend 1GB for swap, if you have 2-4GB RAM then you should spend half of the size of RAM for swap, and otherwise you should spend 2GB for swap.
To format a partition, use the command mkfs.filsystem_type /dev/sdax, here filesystem_type can be ext2, ext4, jfs, etc., and /dev/sdax is the partiton number.
You should also format and enable the swap partition with the mkswap and swapon commands.
mkfs.ext4 /dev/sda1
mkfs.ext4 /dev/sda2
mkswap /dev/sda3
swapon /dev/sda3
Mount the system
For example,
-
Mount the root partition (mount point
/) at/mnt.mount /dev/sda1 /mnt -
Create
/mnt/homefor mounting the home partition (mount point/home).mkdir -p /mnt/home mount /dev/sda2 /mnt/home -
I have Windows OS installed in
/dev/sda4, so I create/mnt/windowsdirectory for mounting the partition.mkdir -p /mnt/windows mount /dev/sda4 /mnt/windows
Basic packages
pacstrap /mnt base base-devel linux-lts linux-lts-headers linux-firmware
pacstrap /mnt nano git rsync
It might be safer to use the Linux LTS kernel instead of the latest one.
I also want to use wifi-menu (a part of the netctl package) in my newly installed system:
pacstrap /mnt netctl iw dialog wpa_supplicant
Generate a fstab file
A fstab file defines how disk partitions, block devices or remote file systems are mounted into the filesystem.
genfstab -U /mnt >> /mnt/etc/fstab
The option -U indicates defining by UUID.
To define by labels, use option -L.
Configure new system
Change root into the new system with
arch-chroot /mnt
Set timezone
ln -sf /usr/share/zoneinfo/Region/City /etc/localtime
hwclock --systohc # generate /etc/adjtime
For Vietnamese, the Region is Asia, and the City is Ho_Chi_Minh.
Locale
Uncomment en_US.UTF-8 UTF-8 and other needed localizations in /etc/locale.gen, and generate them with:
locale-gen
Set the LANG variable in /etc/locale.conf accordingly, for example LANG=en_US.UTF-8.
Hostname
Create /etc/hostname
echo my_hostname > /etc/hostname
and matching entries to /etc/hosts
127.0.0.1 localhost
::1 localhost
127.0.1.1 my_hostname.localdomain my_hostname
Users
To change root password, use passwd command.
To create a new user, use useradd command.
For example,
useradd -m -g users -G audio,lp,optical,storage,video,wheel,games,power,scanner -k /etc/skel/ -s /bin/bash user
Use /usr/bin/zsh instead of /bin/bash if you want to use Z Shell instead of Bash as your default shell.
Now, edit /etc/sudoers by uncommenting the line %wheel ALL=(ALL) ALL to allow all members of the group wheel sudo access.
To add an user to a group, use usermod -aG <group name> <username>.
To remove an user, use userdel <username>.
To remove a group, use groupdel <groupname>.
To change a user default shell, use chsh -s <shell>, where <shell> can be obtained from a list resulted by running chsh -l.
See this page for more details.
For making your bash or zsh shells look more beautiful, see also oh-my-zsh and oh-my-bash.
Boot loader
My ASUS laptop has Intel(R) Pentium(R) CPU B950 @ 2.10GHz (use cat /proc/cpuinfo to show CPU info), so I need to first install intel-ucode package using
pacman -S intel-ucode
I also have Windows partition, so I need os-prober package.
pacman -S os-prober
I also edit /etc/default/grub by changing
GRUB_CMDLINE_LINUX_DEFAULT="quiet"
into
GRUB_CMDLINE_LINUX_DEFAULT=""
Now, I can run the grub installation using
grub-install /dev/sda
and finally generate the grub configuration file
grub-mkconfig -o /boot/grub/grub.cfg
Initramfs
I modify /etc/mkinitcpio.conf by changing
HOOKS=(base udev autodetect modconf block filesystems keyboard fsck)
into
HOOKS=(base udev autodetect modconf block filesystems keyboard fsck shutdown)
and recreate the initramfs image with
mkinitcpio -p linux-lts
Reboot
Exit the chroot environment by typing exit or press Ctrl + D.
Unmount all the partitions with umount -R /mnt.
Type reboot to restart the system.
Remove the installation media and then login into the new system with the root account.
Packages and Configuration
Rank Mirrors
sudo pacman -S --needed --noconfirm python pacman-contrib
sed -ie'' 's/^#S/S/g' /etc/pacman.d/mirrorlist
rankmirrors -v /etc/pacman.d/mirrorlist | tee /etc/pacman.d/mirrorlist.new && mv /etc/pacman.d/mirrorlist.new /etc/pacman.d/mirrorlist
sudo pacman -Syy
Desktop Environments
sudo pacman -S --needed --noconfirm gnome gnome-extra gnome-flashback
sudo pacman -S --needed --noconfirm xorg xorg-server
Enable Networking
sudo systemctl start NetworkManager
sudo systemctl enable NetworkManager
Enable Printing Service
You must install cups before doing this.
sudo systemctl start org.cups.cupsd.service
sudo systemctl enable org.cups.cupsd.service
Time Setting
To avoid time display error between Arch Linux and Windows, use
sudo timedatectl set-local-rtc 1 --adjust-system-clock
Note: If you log in as a normal user, run timedatectl set-local-rtc 1 --adjust-system-clock (without sudo).
Archive Formats
yay -S --needed --noconfirm unace unrar unzip zip lrzip p7zip sharutils uudeview mpack arj cabextract file-roller
Packer/Yaourt/Pamac
In Arch Linux, users can add and install their favorite packages from AUR, aka Arch User Repository via the pacman package manager.
Since AUR contains about 44,000 packages, for most of them, one need to manually download, check, and install.
This is where packer or yaourt come in handy.
Here is how I install yaourt.
(The original guide is here).
sudo pacman -S --needed --noconfirm base-devel git wget yajl
git clone https://aur.archlinux.org/package-query.git
cd package-query
makepkg -si
cd ..
git clone https://aur.archlinux.org/yaourt.git
cd yaourt
makepkg -si
cd ..
sudo rm -dR yaourt/ package-query/
If you need a GUI, install pamac-aur.
Update (2018-11-14): Both packer and yaourt are outdated and discontinued. Use yay (yet another yogurt) instead.
Theme
yay -S --needed --noconfirm arc-gtk-theme paper-icon-theme papirus-icon-theme
Note (2021-12-19): Orchis is a nice theme for GNOME/GTK based desktop environments. I used the Orchis-grey-dark variant with the Backout icon set.
yay -S --needed --noconfirm orchis-theme-git
Media Codecs
yay -S --needed --noconfirm exfat-utils fuse-exfat a52dec faac faad2 flac jasper lame libdca libdv \
gst-libav libmad libmpeg2 libtheora libvorbis libxv wavpack x264 xvidcore \
flashplugin libdvdcss libdvdread libdvdnav dvd+rw-tools dvdauthor dvgrab
Fonts and Keyboards
yay -S --needed --noconfirm ibus ibus-unikey ibus-anthy
yay -S --needed --noconfirm ttf-vietnamese-tcvn3 ttf-vietnamese-vni ttf-hannom
yay -S --needed --noconfirm ttf-google-fonts-git ttf-mac-fonts ttf-monaco ttf-windows
Enable GDM
To enable GDM (GNOME Display Manager), use
sudo systemctl start gdm
sudo systemctl enable gdm
Oracle Java & Eclipse
sudo pacman -S --needed --noconfirm jdk-openjdk jre-openjdk # latest java
sudo pacman -S --needed --noconfirm jdk11-openjdk jre11-openjdk jdk8-openjdk jre8-openjdk # version 8 and 11
sudo archlinux-java set java-11-openjdk # set default Java environment, use `sudo archlinux-java status` to see available versions
yay -S --needed --noconfirm eclipse-java
As eclipse-java and eclipse-cpp are in conflict, to use C/C++ Development Tools, I install CDT 9.5.5 for Eclipse Photon and 2018-09 in eclipse-java by choosing Help > Install New Software..., add the CDT repository http://download.eclipse.org/tools/cdt/releases/9.5, and install the CDT Main Features and CDT Optional Features.
Missing Firmware
When running mkinitcpio -p linux, if you get the warning
==> WARNING: Possibly missing firmware for module: wd719x
==> WARNING: Possibly missing firmware for module: aic94xx
then simply install the wd719x-firmware and aic94xx-firmware packages using yay and run mkinitcpio -p linux again.
Note (2022-01-31): If you get the warning
==> WARNING: Possibly missing firmware for module: xhci_pci
then install upd72020x-fw.
Note (2022-02-26): If you get the warning
==> WARNING: Possibly missing firmware for module: qla2xxx
==> WARNING: Possibly missing firmware for module: qed
==> WARNING: Possibly missing firmware for module: bfa
==> WARNING: Possibly missing firmware for module: qla1280
then install linux-firmware-qlogic.
Downgrade
Install the downgrade package using yay.
This package helps you install some previous version of a current package, which is very useful in case of conflicted dependencies.
If you want a specific version of a package, say netpbm-10.73-1-x86_64.pkg.tar.xz (a dependency for latex2html), you can go to https://archive.archlinux.org/packages/ to look for the package at https://archive.archlinux.org/packages/n/netpbm and install using
sudo pacman -U https://archive.archlinux.org/packages/n/netpbm/netpbm-10.73-1-x86_64.pkg.tar.xz
Update (2019-12-31): Another place to look for old Arch Linux packages is Internet Archive.
A trick is to go to the page https://archive.org/download/archlinux_pkg_<package-name> if you want to find old versions of <package-name>, e.g., to find old versions of netpbm, go to https://archive.org/download/archlinux_pkg_netpbm.
For more information, see Arch Linux Archive.
(Vanilla) TeXLive 2017
There is no trouble installing Vanilla TeXLive, but I want to add some note: Install texlive-dummy via yaourt in order to tell pacman that you’ve already installed TeXLive.
You can also install TeXLive with
sudo pacman -S --needed --noconfirm texlive-most texlive-lang texmaker biber
pdf2htmlEX
To compile and install pdf2htmlEX (in Arch Linux 64-bit version), I use poppler and poppler-glib version 0.59.0-1, fontforge version 20141126-3, together with the pdf2htmlex-git package.
First, install some necessary packages
sudo pacman -S --needed --noconfirm poppler-data
wget https://archive.org/download/archlinux_pkg_poppler/poppler-0.59.0-1-x86_64.pkg.tar.xz && sudo pacman -U --noconfirm poppler-0.59.0-1-x86_64.pkg.tar.xz
wget https://archive.org/download/archlinux_pkg_poppler-glib/poppler-glib-0.59.0-1-x86_64.pkg.tar.xz && sudo pacman -U --noconfirm poppler-glib-0.59.0-1-x86_64.pkg.tar.xz
wget https://archive.org/download/archlinux_pkg_automake/automake-1.15-1-any.pkg.tar.xz && sudo pacman -U automake-1.15-1-any.pkg.tar.xz
sudo pacman -S --needed --noconfirm libxi pango giflib libtool desktop-file-utils gtk-update-icon-cache libunicodenames gc python shared-mime-info openjpeg2 qt5-base poppler popper-glib poppler-qt5
Next, install fontforge 20141126-3 along with its dependencies
yay -S readline6 # for `libreadline.so.6`
wget https://archive.org/download/archlinux_pkg_libsodium/libsodium-0.7.1-1-x86_64.pkg.tar.xz && sudo pacman -U --noconfirm libsodium-0.7.1-1-x86_64.pkg.tar.xz
wget https://archive.org/download/archlinux_pkg_zeromq/zeromq-4.0.6-1-x86_64.pkg.tar.xz && sudo pacman -U zeromq-4.0.6-1-x86_64.pkg.tar.xz
wget https://archive.org/download/archlinux_pkg_libxkbui/libxkbui-1.0.2-6-x86_64.pkg.tar.xz && sudo pacman -U libxkbui-1.0.2-6-x86_64.pkg.tar.xz
wget https://archive.org/download/archlinux_pkg_libspiro/libspiro-1%3A0.5.20150702-2-x86_64.pkg.tar.xz && sudo pacman -U libspiro-1:0.5.20150702-2-x86_64.pkg.tar.xz
wget https://archive.org/download/archlinux_pkg_fontforge/fontforge-20141126-3-x86_64.pkg.tar.xz && sudo pacman -U fontforge-20141126-3-x86_64.pkg.tar.xz
Now, install pdf2htmlex-git with the command yay -S pdf2htmlex-git. To see how it was actually installed, I put here the content of the corresponding PKGBUID.
# Maintainer: Miguel Revilla <yo at miguelrevilla dot com>
# Contributor: Arthur Țițeică arthur.titeica/gmail/com

pkgname=pdf2htmlex-git
pkgver=1742.f12fc15
pkgrel=3
epoch=1
pkgdesc="Convert PDF to HTML without losing format. Text is preserved as much as possible."
arch=('i686' 'x86_64')
url="https://github.com/coolwanglu/pdf2htmlEX"
license=('GPL3' 'custom')
depends=('poppler' 'fontforge')
makedepends=('cmake' 'git')
optdepends=('ttfautohint: Provides automated hinting process for web fonts')
provides=('pdf2htmlex')
conflicts=('pdf2htmlex')
replaces=('pdf2htmlex')
source=('git://github.com/coolwanglu/pdf2htmlEX.git'
        '735.patch'
        'override.patch')
md5sums=('SKIP'
         '61100dcfa593c90ef9ee2ac3f6206a77'
         'ae6ab1c7b5d5f2a4d4edf67ff4746143')

_gitname=pdf2htmlEX
_pkgname=pdf2htmlEX

pkgver() {
  cd "${_gitname}"
  # git describe --always | sed 's|-|.|g'
  echo $(git rev-list --count HEAD).$(git rev-parse --short HEAD)
}

prepare() {
  cd "${_gitname}"
  patch -p1 < "${srcdir}/735.patch"
  patch < "${srcdir}/override.patch"

  cd 3rdparty/poppler/git
  sed -i 's|globalParams->getStrokeAdjust()|gTrue|' CairoOutputDev.cc
}

build() {
  cd "${_gitname}"

  cmake . \
  -DCMAKE_INSTALL_PREFIX=/usr
  make CXXFLAGS=-Doverride=
}

package() {
  cd "${_gitname}"
  make DESTDIR="${pkgdir}/" install
  install -Dm0644 LICENSE "${pkgdir}/usr/share/licenses/${_pkgname}/LICENSE"

}

# vim:set ts=2 sw=2 et:
Finally, upgrading poppler, poppler-glib, and reinstalling their old versions to /usr/local:
-
sudo pacman -S --noconfirm --needed poppler poppler-glib libsodium. -
Install
poppler 0.59.0from sourcewget https://poppler.freedesktop.org/poppler-0.59.0.tar.xz tar -xvf poppler-0.59.0.tar.xz cd poppler-0.59.0/ ./configure --prefix=/usr/local --enable-xpdf-headers make sudo make install sudo ln -s /usr/local/lib/libpoppler.so.70 /usr/lib/libpoppler.so.70 # so that pdf2htmlEX can find it later -
Install
libsodium 0.7.1from sourcecurl -O https://download.libsodium.org/libsodium/releases/old/unsupported/libsodium-0.7.1.tar.gz tar xvf libsodium-0.7.1.tar.gz cd libsodium-0.7.1/ ./configure --prefix=/usr/local make sudo make install sudo ln -sf /usr/local/lib/libsodium.so.13 /usr/lib/libsodium.so.13
ClamAV
sudo pacman -S --needed --noconfirm clamav clamtk # installation
sudo systemctl enable clamav-daemon # enable clamav-daemon
sudo systemctl start clamav-daemon # start clamav-daemon
sudo freshclam # update virus database
Docker
sudo pacman -S --needed --noconfirm docker
sudo systemctl enable docker
sudo systemctl start docker
sudo usermod -aG docker $USER # if the group `docker` does not exist then create it using `sudo groupadd docker`
pass password manager
yay -S --noconfirm tree pass pass-import dmenu
If you get the error
pass-import-2.3.tar.gz ... FAILED (unknown public key C5469996F0DF68EC)
then run
gpg --keyserver pool.sks-keyservers.net --recv-keys C5469996F0DF68EC
One can also install the latest pass-import from its GitHub repository as follows
git clone https://github.com/roddhjav/pass-import/
cd pass-import
sudo make install
See this page for a guide on how to use pass with docker.
SRWare Iron
SRWare Iron is a Chromium-based renowned browser for privacy and security. To install it on Arch Linux, run the following commands in Terminal.
wget http://www.srware.net/downloads/iron64.deb
mkdir -p iron64 && ar xv iron64.deb --output iron64
cd iron64
tar xvf data.tar.xz
sudo chown -R root:root usr
sudo chown root usr/share/iron/chrome-sandbox
sudo chmod 4755 usr/share/iron/chrome-sandbox
sudo chmod 4755 usr/share/iron/chrome-wrapper
sudo rsync -arv usr /
cd .. && sudo rm -rf iron64*
To use SRWare Iron with Google Sync, follow this guide. Basically, the steps are:
- Go to https://groups.google.com/a/chromium.org/g/google-browser-signin-testaccounts with your Google Account.
- Join the group.
- You can use sync.
SageMath (compile from source)
- This instruction was updated on 2023-04-22.
- Install necessary packages as described here.
sudo pacman -S arb bc binutils boost brial cblas cddlib cmake ecl eclib fflas-ffpack flintqs gc gcc gcc-fortran gd gf2x gfan giac glpk gsl iml lapack lcalc libatomic_ops libbraiding libgiac libhomfly linbox lrcalc m4 m4ri m4rie make meson nauty ninja openblas openssl palp pari pari-elldata pari-galdata pari-galpol pari-seadata patch perl planarity ppl primecount primesieve python python-tox qhull rankwidth readline singular sqlite3 suitesparse symmetrica sympow tachyon tar which sudo pacman -S autoconf automake git github-cli gnupg libtool openssh pkg-config sudo pacman -S ffmpeg imagemagick pandoc texlive-core texlive-langcyrillic texlive-langjapanese texlive-latexextra sudo pacman -S 4ti2 clang coin-or-cbc coxeter graphviz igraph intel-oneapi-tbb libxml2 lrs pari-elldata pari-galpol pari-seadata pdf2svg perl-term-readline-gnu polymake r yay -S python39 - Clone from GitHub and compile
cd $HOME ORIG=https://github.com/sagemath/sage.git git clone -c core.symlinks=true --branch master --tags $ORIG cd sage make configure ./configure --with-python=/usr/bin/python3.9 --without-system-zeromq --without-system-singular SAGE_KEEP_BUILT_SPKGS=yes MAKE='make -j8' make - Create
/usr/share/applications/sage-jupyter-notebook.desktopwith the following content, replace<username>with your username and/home/<username>/SageMathNotebookswith the path to the folder where you want to save SageMath Jupyter Notebooks.[Desktop Entry] Name=Jupyter notebook with Sage Name[en]=Jupyter notebook with Sage Comment=Scientific Computing using Jupyter notebook and Sage Comment[en]=Scientific Computing using Jupyter notebook and Sage Exec=/home/<username>/sage/sage -n jupyter --notebook-dir='/home/<username>/SageMathNotebooks' Icon=/home/<username>/sage/src/sage/ext_data/notebook-ipython/logo.svg Terminal=false Type=Application Categories=Education;Math;Science; StartupNotify=true Name[en_US]=SageMath Jupyter Notebook - Edit
$HOME/.bashrcalias sage="~/sage/sage" alias sage-clear="echo yes | ~/sage/sage -ipython history clear" alias sage-notebook="~/sage/sage -n jupyter --notebook-dir=/home/<username>/SageMathNotebooks" - Extra packages
sage -i plantri sage_sws2rst rst2ipynb
Vim
See this page for some installations and configurations in Windows.
Install GVim, some plugins, and extra fonts
yay -S gvim vim-colors-solarized-git \
	vim-pathogen vim-rainbow-parentheses-improved-git \
	vim-hug-neovim-rpc-git python-pynvim nvim-yarp-git vim-deoplete

# all packages in `vim-plugins` group, except `vim-latexsuite`
yay -S vim-airline vim-airline-themes vim-ale vim-align vim-ansible vim-bufexplorer \
	vim-coverage-highlight vim-csound vim-ctrlp vim-easymotion vim-editorconfig \
	vim-fugitive vim-gitgutter vim-grammalecte vim-indent-object vim-jad vim-jedi \
	vim-molokai vim-nerdcommenter vim-nerdtree vim-pastie vim-seti vim-supertab \
	vim-surround vim-syntastic vim-tabular vim-tagbar vim-ultisnips vim-vital

yay -S nerd-fonts-complete otf-nerd-fonts-monacob-mono
A better idea may be to install some necessary Python packages via pip to suit your current Python version.
sudo pip install coverage jedi jinja2 markupsafe pynvim
Create local directories for plugins and temporay files
Plugins will be saved to ~/.vim/bundle.
mkdir -p ~/.vim/autoload ~/.vim/bundle
mkdir -p ~/.vim/backup ~/.vim/info ~/.vim/swap ~/.vim/undo
Beside the above Arch Linux packages, I also installed some more plugins:
- Xuyuanp/nerdtree-git-plugin.
- ryanoasis/vim-devicons.
- tiagofumo/vim-nerdtree-syntax-highlight.
- PhilRunninger/nerdtree-buffer-ops.
- PhilRunninger/nerdtree-visual-selection.
Some configurations
Add the following to ~/.vimrc. Every time you modify this file, run :so ~/.vimrc to reload the configurations in GVim.
set runtimepath=~/.vim,$VIM/vimfiles,$VIMRUNTIME,$VIM/vimfiles/after,~/.vim/after

set encoding=utf-8
set fileencoding=utf-8
set termencoding=utf-8

" Taken from https://learnvimscriptthehardway.stevelosh.com/chapters/07.html
" edit Vim configurations
nnoremap <leader>ev :split $MYVIMRC<cr>
nnoremap <leader>sv :source $MYVIMRC<cr>
nnoremap <leader>egv :split $MYGVIMRC<cr>
nnoremap <leader>sgv :source $MYGVIMRC<cr>

" pathogen
"" To disable a plugin in ~/.vim/bundle, add it's bundle name to the following list
let g:pathogen_blacklist = []
"call add(g:pathogen_blacklist, 'vim-latex')
"call add(g:pathogen_blacklist, 'vim-evince-synctex')
"call add(g:pathogen_blacklist, 'vimtex')
execute pathogen#infect()

set nocompatible
filetype plugin indent on " Load plugins according to detected filetype
set grepprg=grep\ -nH\ $*

" NERDTree
" Start NERDTree. If a file is specified, move the cursor to its window.
autocmd StdinReadPre * let s:std_in=1
autocmd VimEnter * NERDTreeCWD | if argc() > 0 || exists("s:std_in") | wincmd p | endif
" Exit Vim if NERDTree is the only window remaining in the only tab.
autocmd BufEnter * if tabpagenr('$') == 1 && winnr('$') == 1 && exists('b:NERDTree') && b:NERDTree.isTabTree() | quit | endif
" Close the tab if NERDTree is the only window remaining in it.
autocmd BufEnter * if winnr('$') == 1 && exists('b:NERDTree') && b:NERDTree.isTabTree() | quit | endif
" If another buffer tries to replace NERDTree, put it in the other window, and bring back NERDTree.
autocmd BufEnter * if bufname('#') =~ 'NERD_tree_\d\+' && bufname('%') !~ 'NERD_tree_\d\+' && winnr('$') > 1 |
	\ let buf=bufnr() | buffer# | execute "normal! \<C-W>w" | execute 'buffer'.buf | endif
" Open NERDTree on each new tab.
autocmd BufWinEnter * if getcmdwintype() == '' | silent lcd %:p:h | NERDTreeCWD | wincmd p | endif
let g:NERDTreeWinSize = 20

autocmd BufEnter * silent! lcd %:p:h " move to current folder

set background=dark
colorscheme solarized

set tabstop=4
set softtabstop=0
set noexpandtab
set shiftwidth=4

set showmode " Show current mode in command line
set incsearch " Highlight while searching with / or ?
set hlsearch " Keep matches highlighted

set splitbelow             " Open new windows below the current window.
set splitright             " Open new windows right of the current window.

set cursorline             " Find the current line quickly.
set wrapscan               " Searches wrap around end-of-file.

syntax enable " enable syntax highlight
set nu " line numbers
set wrap " text wrap
set lbr
set ai " autoindent

" Autocomplete brackets
inoremap { {}<Esc>ha
inoremap ( ()<Esc>ha
inoremap [ []<Esc>ha
inoremap " ""<Esc>ha
inoremap ' ''<Esc>ha
inoremap ` ``<Esc>ha

" Rainbow brackets
let g:rainbow_active = 1

" Press Ctrl+C for copying a line
vnoremap <C-c> "*y

set clipboard+=unnamed  " use the clipboards of vim and OS
" set paste               " Paste from a windows or from vim
set go+=a               " Visual selection automatically copied to the clipboard

" folding
set foldmethod=syntax
set foldnestmax=3
set nofoldenable
set foldlevel=2

" settings for airline
let g:airline_theme='solarized'
let g:airline_solarized_bg='dark'

" deoplete settings
let g:deoplete#enable_at_startup = 1 " use deoplete for autocompleting

" Put all temporary files under the same directory.
" https://github.com/mhinz/vim-galore#temporary-files
set backup
set backupdir   =$HOME/.vim/backup/
set backupext   =-vimbackup
set backupskip  =
set directory   =$HOME/.vim/swap/
set updatecount =100
set undofile
set undodir     =$HOME/.vim/undo/
set viminfo     ='100,n$HOME/.vim/info/viminfo

" Syntastic settings
set statusline+=%#warningmsg#
set statusline+=%{SyntasticStatuslineFlag()}
set statusline+=%*
let g:syntastic_always_populate_loc_list = 1
let g:syntastic_auto_loc_list = 1
" let g:syntastic_check_on_open = 1
let g:syntastic_mode_map = { 'mode': 'passive', 'active_filetypes': [],'passive_filetypes': [] }
let g:syntastic_check_on_wq = 0

" Use ctrl-[hjkl] to select the active split!
nmap <silent> <c-k> :wincmd k<CR>
nmap <silent> <c-j> :wincmd j<CR>
nmap <silent> <c-h> :wincmd h<CR>
nmap <silent> <c-l> :wincmd l<CR>

" mouse settings
set mouse=a
set mousef
set scf
set mousemodel=popup

" Taken from https://vim.fandom.com/wiki/Insert_current_date_or_time
" If buffer modified, update any matched pattern (Last modified, Last updated, etc.) in the first 20 lines.
" 'Last modified: ' can have up to 10 characters before (they are retained).
" Restores cursor and window position using save_cursor variable.
function! LastModified()
  if &modified
    let save_cursor = getpos(".")
    let n = min([20, line("$")])
    keepjumps exe '1,' . n . 's#^\(.\{,10}[Ll]ast[\s*_]\([Mm]odified\|[Cc]hange\|[Up]dated\).*: \).*#\1' .
          \ strftime('%a %b %d, %Y  %H:%M %Z') . '#e'
    call histdel('search', -1)
    call setpos('.', save_cursor)
  endif
endfun
autocmd BufWritePre * call LastModified()
Add the following to ~/.gvimrc.
set background=dark
colorscheme solarized
set gfn=MonacoB\ Nerd\ Font\ Mono\ 14
Jekyll-related plugins
cd ~/.vim/bundle
git clone https://github.com/pprovost/vim-markdown-jekyll
git clone https://github.com/parkr/vim-jekyll
I also added the following to ~/.vimrc. Edit the options to fit your requirements.
" vim-jekyll
let g:jekyll_post_dirs = ['_posts']
let g:jekyll_post_extension = '.md'
let g:jekyll_site_dir = '_site'
let g:jekyll_post_template =  [
	\ '---',
	\ 'layout: JEKYLL_LAYOUT',
	\ 'title: "JEKYLL_TITLE"',
	\ 'author: JEKYLL_AUTHOR',
	\ 'categories: ',
	\ '  - MAIN_CAT',
   \ 'last_modified_at: ' . strftime('%a %b %d, %Y  %H:%M %Z'),
   \ '---',
	\ '',
	\ '* TOC',
	\ '{:toc}',
	\ '']
vimtex and evince
I tried to make forward-search and inverse-search work for vimtex and evince.
- Install
vimtexby runninggit clone https://github.com/lervag/vimtex ~/.vim/bundle/vimtex. To stop loadingvimtex(e.g., you want to usevim-latexinstead), add the following, if not exist, to~/.vimrc, beforeexecute pathogen#infect(). This trick can be used with any other plugin located at~/.vim/bundle.let g:pathogen_blacklist = [] call add(g:pathogen_blacklist, 'vimtex') - Install the AUR package
evince-synctex. Edit/usr/bin/evince-synctexby uncommenting (removing the#symbol) one of the two lines starting withEDITORCMD. They will probably look like this after uncommenting#EDITORCMD="gvim --servername '`basename "$1" .pdf`' --remote-silent '+%l<Enter>' %f" # Highlight matched column EDITORCMD="gvim --servername '`basename "$1" .pdf`' --remote-silent '+%l<Enter>:match Search /\%%ll/' %f" ...See
/usr/bin/evince_backward_searchfor more options regardingEDITORCMD. - Edit
/usr/share/applications/org.gnome.Evince.desktopby replacing anyExec=evincebyExec=evince-synctex. Basically,evince-synctexruns bothevinceandevince_backward_searchat the same time. In this way, every time I open a PDF withevinceand Ctrl + “left mouse click” somewhere in it, GVim will open its corresponding source file, if available. (Always compile TeX files withsynctexoption, if possible, for example, likelatexmk -pdf -synctex=1 main.tex. Don’t delete the file with extension.synctex.gzafter compiling your PDF from a.texsource file.) -
git clone https://github.com/gauteh/vim-evince-synctex ~/.vim/bundle/vim-evince-synctexReplacing the contents of
~/.vim/bundle/vim-evince-synctex/bin/evince_backward.shwith the following.#!/usr/bin/env bash if ! ps aux | grep evince_backward_search | grep $2 ; then evince_backward_search "$1" "gvim --servername $2 --remote-silent '+%l<Enter>' %f" & evince "$1" kill %1 fi - Add the following to
~/.vimrc." settings for vimtex let g:vimtex_fold_enabled = 1 let g:tex_flavor = 'latex' " Bind forward search (this command is provided by us) nnoremap <leader>lf :VimtexForwardSearch<CR> "" TOC on the right handside let g:vimtex_toc_config = { \'split_pos' : ':vert :botright', \'split_width': 30 \} " vimtex with deoplete call deoplete#custom#var('omni', 'input_patterns', { \ 'tex': g:vimtex#re#deoplete \})
vim-latex (or latex-suite)
- Add plugins
git clone https://github.com/vim-latex/vim-latex ~/.vim/bundle/vim-latex vim-latexandvimtexare conflicted, comment out allg:vimtex-related options in~/.vimrcand stop loadingvimtexas descried in the previous section.- Add the following to
~/.vimrc." settings for vim-latexsuite let g:tex_flavor='latex' let g:Tex_DefaultTargetFormat = 'pdf' let g:Tex_CompileRule_pdf = 'latexmk -pdf -interaction=nonstopmode -synctex=1 $*' let g:Tex_UseMakefile = 0 let g:Tex_ViewRule_dvi = 'evince' let g:Tex_ViewRule_pdf = 'evince' "let g:Tex_ViewRule_pdf = 'xdg-open' "let g:Tex_ViewRule_pdf = 'okular --unique' "let g:Tex_ViewRule_pdf = 'zathura -x "gvim --servername synctex -n --remote-silent +\%{line} \%{input}"' "let g:Tex_ViewRule_pdf = 'qpdfview --unique' "let g:Tex_ViewRule_pdf = 'texworks' "let g:Tex_ViewRule_pdf = 'mupdf' "let g:Tex_ViewRule_pdf = 'firefox -new-window' "let g:Tex_ViewRule_pdf = 'chromium --new-window' let g:Tex_AutoFolding = 0 let g:Tex_CustomTemplateDirectory = '$HOME/.vim/bundle/vim-latex/ftplugin/latex-suite/templates/'
Some other packages
A non-exhaustive list of some packages I installed (using yay) are:
guake firefox thunderbird google-chrome tor-browser gedit-plugins
vivaldi vivaldi-ffmpeg-codecs
tlp lsb-release smartmontools ethtool
gparted gksu testdisk partimage xfsprogs reiserfsprogs jfsutils ntfs-3g dosfstools mtools grub-customizer hwinfo dislocker-git
openssh subversion git git-lfs github-cli mercurial gufw filezilla openvpn
mlocate cups cups-pdf system-config-printer
gnupg1 veracrypt secure-delete tree authenticator-git
goldendict pdfarranger calibre djview shutter shotwell foxitreader freeoffice ms-office-online zotero
vlc mplayer alsa-utils pulseaudio ytmdesktop-git vidcutter 4kvideodownloader
dropbox-cli nautilus-dropbox megasync grive-git onedrive-abraunegg-git insync1
skypeforlinux-stable-bin telegram-desktop irssi caprine zoom
pidgin finch libpurple pidgin-gnome-shell-extension-git pidgin-gnome-keyring pidgin-indicator purple-facebook-git slack-libpurple-git
visual-studio-code-bin atom asymptote
octave python-networkx python-matplotlib python-graphillion
vmware-horizon-client
woeusb windows2usb-git multisystem multibootusb
julia eclipse-java
ipe tikzit
gnome-shell-extension-appindicator libappindicator-gtk3 gnome-shell-extension-topicons-plus gnome-shell-extension-desktop-icons-ng
texstudio latex2html perl-latexml cwdiff
For a recommendation, see this page or this page. See this page for a list of available applications.
Backup/Re-install the installed packages
Keeping a list of installed packages is useful when you want to speed up installation on a new system or backup a working system. The command
pacman -Qqe > pkglist.txt
generates a list of installed packages (including packages from AUR).
To reinstall the packages in pkglist.txt, use the command
yay -S --needed - < pkglist.txt
One can also use the reflector package for retrieving and filtering the latest Pacman mirror list. See pacman/Tips and tricks for more information.
More installations, configurations, and issues
Error ``Pacman is currently in use, please wait’’
sudo rm /var/lib/pacman/db.lck
Accessing JAIST or eduroam wifi in JAIST
JAIST provides two wireless network services with SSIDs JAIST and eduroam.
The instruction is for Windows, MacOS X, and Android.
I figure that it can also be used for Arch Linux (and maybe some other Linux distributions).
Basically, the wifi security information for accessing these wifi SSIDs (I use NetworkManager for managing network connection) is as follows.
- Security type : WPA & WPA2 Enterprise
- Authentication : TLS
- Identity : [Your JAIST account]@jaist.ac.jp (for students, sXXXXXXX@jaist.ac.jp)
- Domain : [Leave it empty]
- CA certificate : Use the file
/etc/ssl/ca-certificates.crt(make sure that the package ca-certificates-utils is installed) - User certificate : Use the digital certificate provided from JAIST
- User private key : Use the digital certificate provided from JAIST
- User key password : [Your password for reading the provided digital certificate]
Note: Put your digital certificate in some place where the path to it contains no file/folder whose name containing blank space.
Using JAIST’s SSL-VPN service
JAIST also provides an SSL-VPN gateway system.
In Arch Linux, I download F5 Linux CLI (command line interface) Edge Client Installer
(file linuxsslvpn.gz) and install as follows.
tar -xvf linuxsslvpn.tgz
sudo ./Install.sh # Answer `yes` for both questions
To use JAIST SSL-VPN, from the Terminal, you can use the command
f5fpc --start --host vpn.jaist.ac.jp --cert /path/to/your/jaist/digital/certificate
You will have to input your password for reading your digital certificate (provided from JAIST), your username (for student, sXXXXXXX), and the password of your JAIST’s account.
After you successfully start the connection, you can use f5fpc --info to check the connection status.
At the time of writing this post, JAIST provides two VPN networks /Common/jaist-vpn1-na and /Common/jaist-vpn2-na (as shown when using f5fpc --info).
The vpn1 only passes accesses to JAIST through VPN, while vpn2 passes all accesses through VPN.
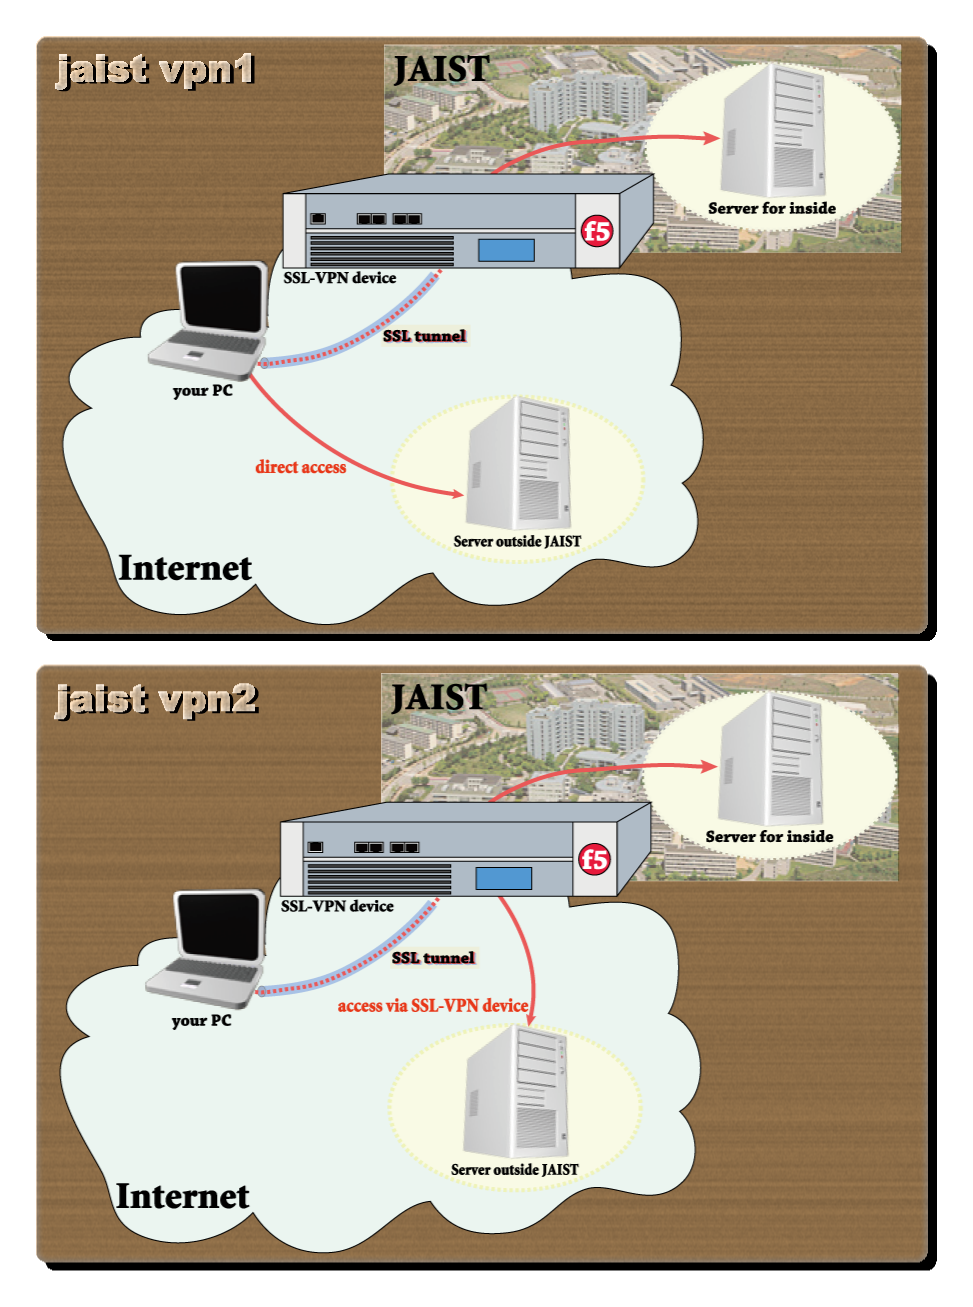
The difference between JAIST
vpn1 and vpn2 (© JAIST RCACI)To use, say vpn2, you can use the command
f5fpc --start --host vpn.jaist.ac.jp --cert /path/to/your/jaist/digital/certificate --fname "/Common/jaist-vpn2-na"
To stop using JAIST SSL-VPN, use the command
f5fpc --stop
Update (2020-09-30): A simpler way to install f5fpc in Arch Linux is to run yay -S f5fpc.
Using Kyutech VPN
To use Kyutech VPN [Username and Password Required], I installed networkmanager-l2tp, xl2tpd, strongswan and networkmanager-strongswan as follows (assuming that yay was installed).
yay -S networkmanager-l2tp xl2tpd strongswan networkmanager-strongswan
The information for setting up VPN are as follows
- Name: Any name you want, for instance,
KIT VPN. - Gateway: Enter the server name as instructed by Kyutech here.
- Username: Your username provided by Kyutech.
- Password: The password of your Kyutech account.
- IPsec Settings: Choose
Enable IPsec Tunnel to L2TP hostand enter the pre-shared key as instructed by Kyutech here. In theAdvancedsection, clickLegacy Proposals.
Update (2020-02-14): In my recent system, clicking Legacy Proposals is not required.
Using KyotoU VPN
You will need to get a client certificate [KyotoU Credentials Required]. Use NetworkManager to import the following OpenVPN configuration file and adjust the path to the above certificate.
VPN Gate
VPN Gate is developed by researchers from Graduate School of University of Tsukuba, Japan for expanding the knowledge of “Global Distributed Public VPN Relay Servers”. See this page for more details on how to install and use this service in Linux. I briefly summarized what I did here.
yay -S git openvpn python-requests python-urwid wmctrl
git clone https://github.com/Dragon2fly/vpngate-with-proxy.git
cd vpngate-with-proxy
./run [arg] # [arg] could be either none or 'tui' or 'cli'
Anjuta opens my folders
To fix this, use the command
xdg-mime default org.gnome.Nautilus.desktop inode/directory
Visual Studio Code (VS Code) opens my folders
After installing VS Code (visual-studio-code-bin), anything opened using the “Places” extension in GNOME opens VS Code instead of the default folder/path (as described here). To resolve this issue, I simply add the lines
[Default Applications]
inode/directory=org.gnome.Nautilus.desktop
to ~/.config/mimeapps.list (or just the second line if [Default Applications] already exists).
Auto reconnect Bluetooth devices at boot
The original instruction is available here.
- Enable
bluetoothservice:sudo systemctl enable bluetooth.service. - Set bluetooth adapter to automatically power on: edit
/etc/bluetooth/main.confand setAutoEnable=true. - Set paired devices as trusted: Type
bluetoothctl, it will open a new console. In that console, typetrust XX:XX:XX:XX:XX:XXfor each paired device (replaceXX...with mac address).
Pairing bluetooth devices on dual boot of Windows and Linux
Recently, I’ve bought a HP X4000b Bluetooth Mouse and having trouble when I have to re-pair the device again and again every time I switch between Arch Linux and Windows 10. Luckily, I found this instruction. I describe the steps here.
- Pair all Bluetooth devices with Arch Linux.
- Pair all Bluetooth devices with Windows 10.
- Copy the Windows pairing keys
- Install
chntpwusingsudo pacman -S --needed --noconfirm chntpw. - Mount Windows system drive.
cd /[windowsSystemDrive]/Windows/System32/config.chntpw -e SYSTEMopens up a console. Run the following commands in that console.cd ControlSet001\Services\BTHPORT\Parameters\Keys ls # shows your bluetooth port's mac address, # for example, the output is as follows # Node has 1 subkeys and 0 values # key name # <aa1122334455> cd aa1122334455 # CD into the folder ls # lists of existing devices' MAC addresses # for example, the output is as follows # Node has 0 subkeys and 1 values # size type value name [value if type DWORD] # 16 REG_BINARY <001f20eb4c9a> hex 001f20eb4c9a # the output is of the form # :00000 XX XX XX XX XX XX XX XX XX XX XX XX XX XX XX XX ...ignore..chars.. # the XXs are the pairing key- Make a note of which Bluetooth device MAC address matches which paring key. In Arch Linux, we won’t need the spaces in-between. Ignore the
:00000. - Add the windows key to Linux config entries.
- Switch to root
sudo -s. cdto your bluetooth config location/var/lib/bluetooth/[bth port mac addresses)].- Here you’ll find folders for each device you’ve paired with. The folder names being the Bluetooth devices mac address and contain a single file
info. In these files, you’ll see the link key you need to replace with your windows ones like so.[LinkKey] Key=B99999999FFFFFFFFF999999999FFFFF
- Switch to root
- Once updated, restart the bluetooth service
sudo systemctl restart bluetooth.
- Install
Note: If you Pair all Bluetooth devices with Windows 10 first, and then with Arch Linux, then the key for all systems should be the key of the last system the devices were paired, which is Arch Linux in this case.
Update (2024-04-16): The above steps do not work for a Bluetooth LE (Low Energy) device, such as the Wireless/Bluetooth HP FM710A Mouse that I’ve purchased recently. I follow this guide. I copied the steps here.
- First pair in Linux
- Reboot
- Pair in Windows
- Get the key values from
HKEY_LOCAL_MACHINE\SYSTEM\ControlSet001\Services\BTHPORT\Parameters\Keys\{computer-bluetooth-mac}\{device-bluetooth-id}. It may beControlSet001orControlSet002which one cane be found inSYSTEM\Selectbut it’s usuallyControlSet001. This can be done e.g. usingchntpw(from linux) as followscd {PATH_TO_WINDOWS_PARTITION}/Windows/System32/config/ chntpw -e SYSTEM - In Linux, go to
/var/lib/bluetooth/{computer-bluetooth-mac}. - Check for a directory that closely resembles the device bluetooth id (they are usually a bit off because they may change whenever you pair again)
- Rename that directory to match the device id
- Edit the info file in the renamed directory
- Copy the value of:
IRKinto Key inIdentityResolvingKeyCSRKinto Key inLocalSignatureKeyLTKinto Key inLongTermKeyERandintoRand: Take the hex valueab cd ef, byte reverse it (ef cd ab) and convert it into decimal (e.g. using the Programming mode of the calculator application)EDIVintoEDiv: Just take the hex value and convert it normally or use the decimal value directly if it is displayed (chntpwdisplays it)- Reboot
GnuPG
Missing PGP keys when installing gnupg1
If you get the error
==> PGP keys need importing:
 -> D8692123C4065DEA5E0F3AB5249B39D24F25E3B6, required by: gnupg1
 -> 46CC730865BB5C78EBABADCF04376F3EE0856959, required by: gnupg1
 -> 031EC2536E580D8EA286A9F22071B08A33BD3F06, required by: gnupg1
 -> D238EA65D64C67ED4C3073F28A861B1C7EFD60D9, required by: gnupg1
when installing gnupg1 then you can import the missing keys with the command
gpg --keyserver pgp.mit.edu --recv-keys D8692123C4065DEA5E0F3AB5249B39D24F25E3B6 \
	46CC730865BB5C78EBABADCF04376F3EE0856959 \
	031EC2536E580D8EA286A9F22071B08A33BD3F06 \
	D238EA65D64C67ED4C3073F28A861B1C7EFD60D9
Remove passphrase of a secret key
Let say you want to remove the passphrase of a secret key named PGP-key.asc.
gpg1 --import PGP-key.asc
gpg1 --edit-key <imported PGP key fingerprint>
Then, type passwd in the gpg> command prompt, enter the old passhrase of the imported PGP key, and press Enter for the new passhrase. Answer y when you were asked You don't want a passphrase - this is probably a *bad* idea! Do you really want to do this? (y/N). Finally, type save to save the result and exit the command prompt.
Backup $HOME folder with rsync
cd /path/to/backup/directory
rsync -arvz -H --progress --numeric-ids $HOME/ .
Full backup with rsync
See also the ArchWiki.
rsync -aAXHv --exclude={"/dev/*","/proc/*","/sys/*","/tmp/*","/run/*","/mnt/*","/media/*","/lost+found"} / /path/to/backup
Error “Failed to start User Manager for UID 120. See systemctl status user@120.service for details”
To resolve this error, simply press Alt + F2, login to the TTY shell as root, and run systemctl restart gdm. See this page for more information.
[Laptop] Cannot enable “Tap to click” function of a touchpad
One way is to try to remove xf86-input-synaptics and install xf86-input-libinput. Also, in GNOME, enable “Tap to click” using gsettings set org.gnome.desktop.peripherals.touchpad tap-to-click true and gsettings set org.gnome.desktop.peripherals.touchpad natural-scroll false. To ensure the touchpad events are being sent to the GNOME desktop, use gsettings set org.gnome.desktop.peripherals.touchpad send-events enabled.
Change the directory where cups-pdf outputs printed files
Edit /etc/cups/cups-pdf.conf by adding Out ${HOME}/Documents/cups-pdf. The output will be in your $HOME/Documents/cups-pdf directory.
Some tips when using sudo
See this ArchWiki page for more details.
-
Editting files as
rootwhile still usinggeditas your user.SUDO_EDITOR=gedit sudo -e file.txtsudo -ewill check that you’re allowed to do this, make a copy of the file that you can edit without changing ids manually, start your editor, and then, when the editor exits, copy the file back if it has been changed. -
Reduce the number of times you have to type a password by adding the following line to
/etc/sudoers:Defaults timestamp_timeout=10 # in minutes
Backup/restore/reset GNOME settings with dconf
- Install dconf with
sudo pacman -S dconf. - Backup all settings with
dconf dump / > gnome-settings. - Restore the settings with
dconf load / < gnome-settings. - Reset to default setting with
dconf reset -f /.
Backup and restore wired/wireless/vpn/hotspot connections with NetworkManager
By default, NetworkManager stores all connection files at /etc/NetworkManager/system-connections/, and I just simply backup all of them with
sudo tar czvf /NetworkConnections.tar.gz /etc/NetworkManager/system-connections
To restore the connection files, simply run sudo tar xvf /NetworkConnections.tar.gz -C /, and restart NetworkManager with systemctl restart NetworkManager. Note that if you want to restore these files in a different computer, you also need to change the corresponding MAC addresses of the devices using the commands cd /etc/NetworkManager/system-connections && sed -i -e 's/<old mac>/<new mac>/ *, as described here. To list all network connnections, use nmcli connection show.
Rollback/Restore a pacman -Su sytem update/upgrade with aura
Install the aura or aura-bin or aura-git package using yay.
(I would suggest aura-bin.)
To save the list of installed packages and versions, run sudo aura -B.
To select a previous restore point from date-stamped list, run sudo aura -Br.
To remove all but the last 3 restore points, run sudo aura -Bc 3.
For more details, see The Aura User Guide.
Apache, MariaDB, PHP (LAMP stack), and so on
Apache
Install apache
pacman -S apache
and edit /etc/httpd/conf/httpd.conf by commenting out (adding # at the beginning of) the line
LoadModule unique_id_module modules/mod_unique_id.so
Then,
sudo systemctl enable httpd
sudo systemctl start httpd
Use TLS with localhost in Apache server
Note that this aims to be used only in localhost.
If you plan to deploy TLS in your server, you may need to be more careful in order to prevent vulnerabilities.
The first step is to generate self-signed certificates.
This page contains a very nice step-by-step instruction on how to do it.
I put them all together in a bash script gen_certs.sh
with a slight modification.
You can download script and simply run bash gen_certs.sh localhost.
#!/bin/bash

if [ "$#" != 1 ]; then
	echo "Usage: ./gen_certs.sh NAME"
	exit 1
fi

######################
# Become a Certificate Authority
######################

if [ ! -f "myCA.key" ]; then
	# Generate private key
	openssl genrsa -out myCA.key 4096

	# Create configuration file for generating root certificates
	>config_ssl_ca.cnf cat <<-EOF
	[ req ]
	default_bits = 4096

	prompt = no
	distinguished_name=req_distinguished_name
	req_extensions = v3_req

	[ req_distinguished_name ]
	countryName=UA
	stateOrProvinceName=root region
	localityName=root city
	organizationName=root organisation
	organizationalUnitName=roote department
	commonName=root
	emailAddress=root_email@root.localhost

	[ alternate_names ]
	DNS.1        = localhost
	DNS.2        = www.localhost
	DNS.3        = mail.localhost
	DNS.4        = ftp.localhost

	[ v3_req ]
	keyUsage=digitalSignature
	basicConstraints=CA:true
	subjectKeyIdentifier = hash
	subjectAltName = @alternate_names
	EOF

	# Generate root certificate
	openssl req -new -x509 -nodes -key myCA.key -sha256 -days 36500 -out myCA.pem -config config_ssl_ca.cnf
fi

######################
# Create CA-signed certs
######################

NAME="$1"
# Generate a private key
openssl genrsa -out $NAME.key 4096

# Create a configuration file for generating a certificate-signing request
>$NAME-config_ssl.cnf cat <<-EOF
[ req ]
default_bits = 4096

prompt = no
distinguished_name=req_distinguished_name
req_extensions = v3_req

[ req_distinguished_name ]
countryName=UA
stateOrProvinceName=root region
localityName=root city
organizationName=root organisation
organizationalUnitName=roote department
commonName=root
emailAddress=root_email@root.localhost

[ alternate_names ]
DNS.1        = $NAME
DNS.2        = www.$NAME
DNS.3        = mail.$NAME
DNS.4        = ftp.$NAME

[ v3_req ]
keyUsage=digitalSignature
basicConstraints=CA:false
subjectKeyIdentifier = hash
subjectAltName = @alternate_names
EOF

# Create a certificate-signing request
openssl req -new -sha256 -key $NAME.key -config $NAME-config_ssl.cnf -out $NAME.csr

# Create a config file for the extensions
>$NAME.ext cat <<-EOF
authorityKeyIdentifier=keyid,issuer
basicConstraints=CA:FALSE
keyUsage = digitalSignature, nonRepudiation, keyEncipherment, dataEncipherment
subjectAltName = @alt_names
[alt_names]
DNS.1 = $NAME # Be sure to include the domain name here
DNS.2 = www.$NAME
DNS.3 = mail.$NAME
DNS.4 = ftp.$NAME
EOF

# Create the signed certificate
openssl x509 -req -in $NAME.csr -CA myCA.pem -CAkey myCA.key -CAcreateserial \
-out $NAME.crt -days 825 -sha256 -extfile $NAME.ext

# Cleaning up
rm -rf $NAME.ext
Next, move localhost.key and localhost.crt to /etc/httpd/conf, and in /etc/httpd/conf/httpd.conf, uncomment the following three lines:
LoadModule ssl_module modules/mod_ssl.so
LoadModule socache_shmcb_module modules/mod_socache_shmcb.so
Include conf/extra/httpd-ssl.conf
Finally, edit /etc/httpd/conf/extra/httpd-ssl.conf
SSLCertificateFile "/etc/httpd/conf/localhost.crt"
SSLCertificateKeyFile "/etc/httpd/conf/localhost.key"
and sudo systemctl restart httpd.
Remeber to import the CA certificate myCA.pem to your browser (Google Chrome, Firefox, etc.) in order to avoid the error NET::ERR_CERT_AUTHORITY_INVALID.
Both SSL and non-SSL protocols on the same localhost server
This can be done by creating new VirtualHost.
I simply add the following to /etc/httpd/conf/httpd.conf
<VirtualHost *:80>
    ServerAdmin webmaster@localhost
    DocumentRoot "/srv/http"
    ServerName localhost
    ServerAlias localhost
    ErrorLog "/var/log/httpd/localhost-error_log"
    CustomLog "/var/log/httpd/localhost-access_log" common

    <Directory "/srv/http">
        Require all granted
    </Directory>
</VirtualHost>

<VirtualHost *:443>
    ServerAdmin webmaster@localhost
    DocumentRoot "/srv/http"
    ServerName localhost:443
    ServerAlias localhost:443
    SSLEngine on
    SSLCertificateFile "/etc/httpd/conf/localhost.crt"
    SSLCertificateKeyFile "/etc/httpd/conf/localhost.key"
    ErrorLog "/var/log/httpd/localhost-error_log"
    CustomLog "/var/log/httpd/localhost-access_log" common

    <Directory "/srv/http">
        Require all granted
    </Directory>
</VirtualHost>
MariaDB
To install, run
sudo pacman -S mysql
sudo mysql_install_db --user=mysql --basedir=/usr --datadir=/var/lib/mysql
sudo systemctl enable mysqld
sudo systemctl start mysqld
Run the following command to setup MariaDB root user password
sudo mysql_secure_installation
To create a new user, start MariaDB as root (with the created password in the previous step)
mysql -u root -p
Then, run
CREATE USER '<username>'@'localhost' IDENTIFIED BY '<password>';
To grant all privileges to <username>:
GRANT ALL PRIVILEGES ON *.* TO '<username>'@'localhost' IDENTIFIED BY '<password>';
then refresh the privileges with
FLUSH PRIVILEGES;
To quit, type \q.
You can also combine these commands (see this page for more details):
mysql -u root -p<mysql-root-password> -Bse "CREATE USER '<username>'@'localhost' IDENTIFIED BY '<password>';GRANT ALL PRIVILEGES ON *.* TO '<username>'@'localhost' IDENTIFIED BY '<password>';FLUSH PRIVILEGES;"
PHP
To install, run
sudo pacman -S php php-fpm
Next, create /etc/httpd/conf/extra/php-fpm.conf with the following content:
LoadModule proxy_module modules/mod_proxy.so
LoadModule proxy_fcgi_module modules/mod_proxy_fcgi.so

DirectoryIndex index.php index.html
<FilesMatch \.php$>
    SetHandler "proxy:unix:/run/php-fpm/php-fpm.sock|fcgi://localhost/"
</FilesMatch>
and then add Include conf/extra/php-fpm.conf to the end of /etc/httpd/conf/httpd.conf, and finally
sudo systemctl start php-fpm
sudo systemctl enable php-fpm
sudo systemctl restart httpd
For other methods, see this ArchWiki page.
phpMyAdmin
To install, run
yay -S phpmyadmin php-mcrypt
and edit /etc/php/php.ini by uncommenting (removing the semicolon ; at the beginning of) the lines (if a line does not exist, add it)
extension=bz2
extension=mcrypt
extension=mysqli
Next, create /etc/httpd/conf/extra/phpmyadmin.conf with the contents
Alias /phpmyadmin "/usr/share/webapps/phpMyAdmin"
 <Directory "/usr/share/webapps/phpMyAdmin">
  DirectoryIndex index.php
  AllowOverride All
  Options FollowSymlinks
  Require all granted
 </Directory>
and finally add Include conf/extra/phpmyadmin.conf to /etc/httpd/conf/httpd.conf. Go to http://localhost/phpmyadmin/ to test if your settings work correctly.
If you get the warning message The configuration file now needs a secret passphrase (blowfish_secret)., edit /usr/share/webapps/phpMyAdmin/config.inc.php by entering a 32 characters long string as the value of $cfg['blowfish_secret'] = '<32-characters-string>';.
If you get the warning message The $cfg['TempDir'] (/usr/share/webapps/phpMyAdmin/tmp/) is not accessible. phpMyAdmin is not able to cache templates and will be slow because of this., edit /usr/share/webapps/phpMyAdmin/config.inc.php by adding $cfg['TempDir'] = '/var/tmp/phpMyAdmin'; and then run the following commands as root in the terminal, as instructed here.
mkdir -p /var/tmp/phpMyAdmin
chown http:http /var/tmp/phpMyAdmin
chmod 700 /var/tmp/phpMyAdmin
WebDAV
I wanted to setup a simple WebDAV configuration with my pre-installed Apache HTTP Server, following this instruction.
As in the instruction, with root permission, run
mkdir -p /home/httpd/DAV
chown -R http:http /home/httpd/DAV
mkdir -p /home/httpd/html/dav
chown -R http:http /home/httpd/html/dav
Now, to setup authentication, run sudo htpasswd -c /etc/httpd/conf/passwd username.
Then, I created /etc/httpd/conf/httpd-dav.conf with the following contents.
LoadModule dav_module modules/mod_dav.so
LoadModule dav_fs_module modules/mod_dav_fs.so
LoadModule dav_lock_module modules/mod_dav_lock.so

DAVLockDB /home/httpd/DAV/DAVLock

Alias /dav "/home/httpd/html/dav"

<Directory "/home/httpd/html/dav">
  DAV On
  AllowOverride None
  Options Indexes FollowSymLinks
  AuthType Basic
  AuthName "WebDAV"
  AuthBasicProvider file
  AuthUserFile /etc/httpd/conf/passwd
  Require valid-user
</Directory>
then added Include conf/httpd-dav.conf to /etc/httpd/conf/httpd.conf and finally sudo systemctl restart httpd. To test if these settings work, go to http://localhost/dav, say by using cadaver http://localhost/dav and then enter username and password you set up before. You can also create a ~/.netrc file to automatically login (be aware this is a security risk, since the file contains the password with no encryption; you should set ~/.netrc’s permission to 600 or 400 to limit the access to only yourself). For example, my ~/.netrc contains the following content:
machine localhost # don't put `http://localhost/dav`, just `localhost` is enough
login <your-username>
password <your-password>
A simple email system at localhost with Postfix, Dovecot, and Roundcube
We will install
-
Postfix: A mail transfer agent (MTA) that receives and sends emails via SMTP. Those emails are then stored using a mail delivery agent (MDA).
-
PostfixAdmin: Postfix’s Web Interface.
-
Dovecot: Allow users to remote access the emails stored by MDA via IMAP or POP3.
-
Roundcube: A web-based email client.
Postfix
To install, run
sudo pacman -S postfix
Next, I did some configurations as follows.
-
Uncomment the following line in
/etc/postfix/aliases, and changeyouto a real account.root: youThen,
sudo postalias /etc/postfix/aliasesandsudo newaliases. -
Edit
/etc/postfix/main.cfto reflect the following configuration. Uncomment, change, or add the following linesmyhostname = localhost inet_interfaces = all inet_protocols = all mydestination = $myhostname, localhost.$mydomain, localhost, $mydomain mynetworks_style = host home_mailbox = Maildir/ smtp_host_lookup = native # To look up a host's IP address, Postfix SMTP uses the native service
All other settings may remain unchanged.
Then, we can sudo systemctl start postfix && sudo systemctl enable postfix.
To check if everything works as expected, type from console the following commands to send an email:
telnet localhost smtp
Trying ::1...
Connection failed: Connection refused
Trying 127.0.0.1...
Connected to localhost.
Escape character is '^]'.
220 localhost ESMTP Postfix

mail from: hoanganhduc@localhost
250 2.1.0 Ok

rcpt to: hoanganhduc@localhost
250 2.1.0 Ok

data
354 End data with <CR><LF>.<CR><LF>

A test email using Postfix
.
250 2.0.0 Ok: queued as A91FDC05E0

quit
221 2.0.0 Bye
Connection closed by foreign host.
To check if the email has been received, look at the ~/Maildir/new directory.
To enable TLS with Postfix, first, edit /etc/postfix/main.conf by adding the following lines:
# Secure SMTP sending
smtp_tls_security_level = may # Use TLS if available. To enforce TLS, change `may` to `encrypt`
# Secure SMTP receiving
smtpd_tls_security_level = may
smtpd_use_tls = yes
smtpd_tls_cert_file = /etc/httpd/conf/localhost.crt # See the section regarding using TLS with Apache server
smtpd_tls_key_file = /etc/httpd/conf/localhost.key
Now, to enable STARTTLS (port 587), modify the following lines in /etc/postfix/master.cf as follows:
submission inet n       -       n       -       -       smtpd
  -o syslog_name=postfix/submission
  -o smtpd_tls_security_level=encrypt
  -o smtpd_sasl_auth_enable=yes
  -o smtpd_tls_auth_only=yes
  -o smtpd_reject_unlisted_recipient=no
#  -o smtpd_client_restrictions=$mua_client_restrictions
#  -o smtpd_helo_restrictions=$mua_helo_restrictions
#  -o smtpd_sender_restrictions=$mua_sender_restrictions
  -o smtpd_recipient_restrictions=
  -o smtpd_relay_restrictions=permit_sasl_authenticated,reject
  -o milter_macro_daemon_name=ORIGINATING
To enable SMTPS (port 465), modify the following lines in /etc/postfix/master.cf as follows:
smtps     inet  n       -       n       -       -       smtpd
  -o syslog_name=postfix/smtps
  -o smtpd_tls_wrappermode=yes
  -o smtpd_sasl_auth_enable=yes
  -o smtpd_reject_unlisted_recipient=no
#  -o smtpd_client_restrictions=$mua_client_restrictions
#  -o smtpd_helo_restrictions=$mua_helo_restrictions
#  -o smtpd_sender_restrictions=$mua_sender_restrictions
  -o smtpd_recipient_restrictions=
  -o smtpd_relay_restrictions=permit_sasl_authenticated,reject
  -o milter_macro_daemon_name=ORIGINATING
and in the first line, replace smtps with submissions.
PostfixAdmin
PostfixAdmin is a web interface for Postfix used to manage mailboxes, virtual domains and aliases. To install, run
sudo pacman -S postfixadmin
Next. we need to configure it to work with Apache and MySQL.
To do this, we first create an empty database postfix_db and the corresponding user postfix_user who will have read/write access to postfix_db using the password hunter2.
mysql -u root -p
CREATE DATABASE postfix_db;
GRANT ALL ON postfix_db.* TO 'postfix_user'@'localhost' IDENTIFIED BY 'hunter2';
FLUSH PRIVILEGES;
\q
Next, we can edit the PostfixAdmin configuration file /etc/webapps/postfixadmin/config.inc.php.
<?php
$CONF['configured'] = true;
// correspond to dovecot maildir path /home/vmail/%d/%u
$CONF['domain_path'] = 'YES';
$CONF['domain_in_mailbox'] = 'NO';
$CONF['database_type'] = 'mysqli';
$CONF['database_host'] = 'localhost';
$CONF['database_user'] = 'postfix_user';
$CONF['database_password'] = 'hunter2';
$CONF['database_name'] = 'postfix_db';

// globally change all instances of ''change-this-to-your.domain.tld''
// to an appropriate value
$CONF['default_aliases'] = array (
    'abuse' => 'abuse@localhost',
    'hostmaster' => 'hostmaster@localhost',
    'postmaster' => 'postmaster@localhost',
    'webmaster' => 'webmaster@localhost'
);

$CONF['vacation_domain'] = 'autoreply.localhost';

$CONF['footer_text'] = 'Return to localhost';
$CONF['footer_link'] = 'http://localhost';
The next step is to configure postfixadmin with my pre-installed Apache server with php-fpm above.
Create /etc/httpd/conf/postfixadmin.conf with the following contents
Alias /postfixadmin "/usr/share/webapps/postfixadmin/public"
<Directory "/usr/share/webapps/postfixadmin/public">
    DirectoryIndex index.html index.php
    <FilesMatch \.php$>
        SetHandler "proxy:unix:/run/postfixadmin/postfixadmin.sock|fcgi://localhost/"
    </FilesMatch>
    AllowOverride All
    Options FollowSymlinks
    Require all granted
    SetEnv PHP_ADMIN_VALUE "open_basedir = /tmp/:/usr/share/webapps/postfixadmin:/etc/webapps/postfixadmin/:/var/cache/postfixadmin/templates_c"
    Order Deny,Allow
    Deny from all
    Allow from 127.0.0.1
</Directory>
and add Include conf/postfixadmin.conf to /etc/httpd/conf/httpd.conf and then sudo systemctl restart httpd.
Next, create /etc/php/php-fpm.d/postfixadmin.conf with the following contents
[postfixadmin]
user = postfixadmin
group = postfixadmin
listen = /run/postfixadmin/postfixadmin.sock
listen.owner = root
listen.group = http
listen.mode = 0660
pm = ondemand
pm.max_children = 4
php_admin_value['date.timezone'] = UTC
php_admin_value['session.save_path'] = /tmp
php_admin_value['open_basedir'] = /tmp/:/usr/share/webapps/postfixadmin/:/etc/webapps/postfixadmin/:/usr/bin/doveadm:/var/cache/postfixadmin
and sudo systemctl restart php-fpm.
Finally, go to http://127.0.0.1/postfixadmin/setup.php to finish the setup.
Generate your setup password hash at the bottom of the page once it is done. Write the hash to the config file /etc/webapps/postfixadmin/config.local.php:
$CONF['setup_password'] = 'yourhashhere';
and now you can create a superadmin account at http://127.0.0.1/postfixadmin/setup.php.
Dovecot
To install, run
sudo pacman -S dovecot
Now, we need to configure dovecot.
First, we copy the configuration files to /etc/dovecot.
sudo mkdir -p /etc/dovecot
sudo rsync -arv /usr/share/doc/dovecot/example-config/* /etc/dovecot
Next, edit /etc/dovecot/dovecot.conf
protocols = imap pop3 lmtp
Then, edit /etc/dovecot/conf.d/10-mail.conf
mail_location = maildir:~/Maildir
Next, edit /etc/doveconf/conf.d/10-auth.conf
disable_plaintext_auth = no
auth_username_format = %n
auth_mechanisms = plain login
Finally, edit /etc/dovecot/conf.d/10-master.conf
unix_listener auth-userdb {
    #mode = 0600
    user = postfix
    group = postfix
}
Then, we can now sudo systemctl start dovecot && sudo systemctl enable dovecot.
In case you get the error
doveconf: Fatal: Error in configuration file /etc/dovecot/conf.d/10-ssl.conf line 12: ssl_cert: Can't open file /etc/ssl/certs/dovecot.pem: No such file or directory
then just simply comment out the lines containing /etc/ssl/certs/dovecot.pem.
To enable SSL/TLS with Dovecot, edit /etc/dovecot/conf.d/10-ssl.conf:
ssl = yes
ssl_cert = </etc/httpd/conf/localhost.crt
ssl_key = </etc/httpd/conf/localhost.key
To test if your Dovecot’s configuration works: IMAP and POP3.
Postfix with SASL
I follow the instruction here to setup SASL authentication for Postfix with Dovecot. The steps are as follows:
-
Edit
/etc/postfix/main.cfby adding# Enable SASL smtpd_sasl_auth_enable=yes broken_sasl_auth_clients = yes smtpd_sasl_type=dovecot smtpd_sasl_path=private/auth smtpd_sasl_security_options=noanonymous smtpd_sasl_local_domain=$myhostname smtpd_client_restrictions=permit_sasl_authenticated,reject smtpd_recipient_restrictions=reject_non_fqdn_recipient,reject_unknown_recipient_domain,permit_sasl_authenticated,reject -
Edit
/etc/dovecot/conf.d/10-master.conf:service auth { #unix_listener auth-userdb { # mode = 0666 # user = postfix # group = postfix #} # Postfix smtp-auth unix_listener /var/spool/postfix/private/auth { mode = 0660 user = postfix group = postfix } # Auth process is run as this user. user = root } -
Finally, restart both
postfixanddovecot. To test if your configuration works, follow this instruction.
Roundcube
To install, run
sudo pacman -S roundcubemail
I already have MariaDB for managing databases, and an Apache server with PHP support.
Next, we create a database roundcubemail for the user roundcube identified by paswword password:
mysql -u root -p
CREATE DATABASE `roundcubemail` DEFAULT CHARACTER SET `utf8` COLLATE `utf8_unicode_ci`;
CREATE USER `roundcube`@'localhost' IDENTIFIED BY 'password';
GRANT ALL PRIVILEGES ON `roundcubemail`.* TO `roundcube`@`localhost`;
FLUSH PRIVILEGES;
\q
and then initialize the roundcubemail database tables by mysql -u root -p roundcubemail < /usr/share/webapps/roundcubemail/SQL/mysql.initial.sql.
Now, we copy the example configuration file
cd /etc/webapps/roundcubemail/config
sudo cp -vp config.inc.php.sample config.inc.php
sudo chown http:http config.inc.php
and then edit /etc/webapps/roundcubemail/config/config.inc.php: (Remeber to replace password with your roundcube user password you set before when creating database.)
$config['db_dsnw'] = 'mysql://roundcube:password@localhost/roundcubemail';
$config['default_host'] = 'tls://localhost'; // IMAP host
$config['smtp_server'] = 'tls://localhost';
$config['smtp_port'] = 587;
$config['des_key'] = 'some_awesome_long_semi_random_string';
$config['enable_installer'] = true; // enable the setup wizard
For roundcube to be able to detect mime-types from filename extensions you need to point it to a mime.types file. Apache usually comes with one, thus we can just copy it over.
sudo cp /etc/httpd/conf/mime.types /etc/webapps/roundcubemail/config/mime.types
sudo chown http:http /etc/webapps/roundcubemail/config/mime.types
and then edit /etc/webapps/roundcubemail/config/config.inc.php by adding
$config['mime_types'] = '/etc/webapps/roundcubemail/config/mime.types'; // detect mime-types from filename extensions
Next, edit /etc/php/php.ini
date.timezone = "UTC"
and uncomment extension=iconv, extension=intl and extension=pdo_mysql. You may need to install the php-intl package.
If you have configured open_basedir in php.ini, make sure it includes /etc/webapps and /usr/share/webapps, so PHP can open the required Roundcube files. If open_basedir is disabled/commented out (the default setting), you don’t have to do anything.
Now, copy the configuration file for Apache to /etc/httpd/conf/extra:
sudo cp -vp /etc/webapps/roundcubemail/apache.conf /etc/httpd/conf/extra/roundcube.conf
then, edit /etc/httpd/conf/extra/roundcube.conf by replacing the line php_admin_value open_basedir "/tmp/:/var/cache/roundcubemail:/usr/share/webapps/roundcubemail:/etc/webapps/roundcubemail:/usr/share/pear/:/var/log/roundcubemail" with SetEnv PHP_ADMIN_VALUE "open_basedir=/tmp/:/var/cache/roundcubemail:/usr/share/webapps/roundcubemail:/etc/webapps/roundcubemail:/usr/share/pear/:/var/log/roundcubemail" (if you do not use php-fpm, ignore this setting),
and add Include conf/extra/roundcube.conf to /etc/httpd/conf/httpd.conf, and sudo systemctl restart httpd.
Finally you can visit the Roundcube installation wizard in your browser: http://localhost/roundcube/installer. When testing SMTP config with Roundcube, I get the following error
postfix/submission/smtpd[25422]: warning: TLS library problem: error:14094418:SSL routines:ssl3_read_bytes:tlsv1 alert unknown ca:ssl/record/rec_layer_s3.c:1543:SSL alert number 48:
Typically, this error indicated that PHP fails to verify peer certificate because unknown CA.
A simple solution is to disable verify_peer and/or verify_peer_name in Roundcube’s smtp_conn_options and imap_conn_options by adding the follwoing lines to /etc/webapps/roundcubemail/config/config.inc.php:
$config['smtp_conn_options'] = array(
  'ssl'         => array(
     'verify_peer'      => false,
     'verify_peer_name' => false,
  ),
);
$config['imap_conn_options'] = array(
  'ssl'         => array(
     'verify_peer'      => false,
     'verify_peer_name' => false,
  ),
);
Another solution according to ArchWiki is to copy myCA.pem to /etc/ssl/certs/ and add the following lines to /etc/webapps/roundcubemail/config/config.inc.php
// For STARTTLS IMAP
$config['imap_conn_options'] = array(
 'ssl' => array(
   'verify_peer'       => true,
   // certificate is not self-signed if cafile provided
   'allow_self_signed' => false,
   'cafile'  => '/etc/ssl/certs/myCA.pem',
   // For Letsencrypt use the following two lines and remove the 'cafile' option above.
   //'ssl_cert' => '/etc/letsencrypt/live/mail.my_domain.org/fullchain.pem',
   //'ssl_key'  => '/etc/letsencrypt/live/mail.my_domain.org/privkey.pem',
   // probably optional parameters
   'ciphers' => 'TLSv1+HIGH:!aNull:@STRENGTH',
   'peer_name'         => 'localhost',
 ),
);
// For STARTTLS SMTP
$config['smtp_conn_options'] = array(
 'ssl' => array(
   'verify_peer'       => true,
   // certificate is not self-signed if cafile provided
   'allow_self_signed' => false,
   'cafile'  => '/etc/ssl/certs/myCA.pem',
   // For Letsencrypt use the following two lines and remove the 'cafile' option above.
   //'ssl_cert' => '/etc/letsencrypt/live/mail.my_domain.org/fullchain.pem',
   //'ssl_key'  => '/etc/letsencrypt/live/mail.my_domain.org/privkey.pem',
   // probably optional parameters
   'ciphers' => 'TLSv1+HIGH:!aNull:@STRENGTH',
   'peer_name'         => 'localhost',
 ),
);
Finally, after finishing configuration, add $config['enable_installer'] = false; to /etc/webapps/roundcubemail/config/config.inc.php, and add these lines to /etc/httpd/conf/extra/roundcube.conf.
<Directory /usr/share/webapps/roundcubemail/config>
	Options -FollowSymLinks
	AllowOverride None
	Require all denied
</Directory>
Another error I got when sending an email to my gmail address is something like
postfix/smtp[193578]: connect to gmail-smtp-in.l.google.com[142.251.8.27]:25: Connection timed out
postfix/smtp[193578]: connect to gmail-smtp-in.l.google.com[2404:6800:4008:c15::1a]:25: Network is unreachable
This may be because my ISP blocks my external access to port 25. I verified it by running telnet gmail-smtp-in.l.google.com 25 and got some output like
Trying 74.125.204.27...
Connection failed: Connection timed out
Trying 2404:6800:4008:c15::1a...
telnet: Unable to connect to remote host: Network is unreachable
Gitweb
Gitweb is the default web-based visualizer that comes with Git.
To have a quick look, you can sudo pacman -S lighttpd and run git instaweb --httpd=lighttpd in your project directory and refer to http://127.0.0.1:1234.
(The command will directly open Firefox with that address.)
To stop, run git instaweb --stop.
To use Google Chrome as the default browser for git, run:
git config --global web.browser chrome
git config --global browser."chrome".path "/usr/bin/google-chrome-stable"
To make Gitweb work with Apache, I use the following configurations. First, run
sudo pacman -S --noconfirm --needed git perl-cgi
Then, create /etc/httpd/conf/extra/gitweb.conf with the following contents
LoadModule cgi_module modules/mod_cgi.so

Alias /gitweb "/usr/share/gitweb"
<Directory "/usr/share/gitweb">
    DirectoryIndex gitweb.cgi
    Options ExecCGI
    Require all granted
    <Files gitweb.cgi>
    SetHandler cgi-script
    </Files>
    SetEnv  GITWEB_CONFIG  /etc/gitweb.conf
</Directory>
and then add Include conf/extra/gitweb.conf to /etc/httpd/conf/httpd.conf.
I want to have all my projects in one directory /srv/git, which can be done by editting/creating /etc/gitweb.conf with
# The directories where your projects are. Must not end with a slash.
our $projectroot = "/srv/git";
Now, I can simple create symbolic links to my projects saved at $HOME directory, for example
sudo ln -s $HOME/hoanganhduc.github.io /srv/git/hoanganhduc.github.io
Some other configurations with /etc/gitweb.conf are:
- To enable “blame” view (showing the author of each line in a source file), add
$feature{'blame'}{'default'} = [1];. - To enable syntax highlighting with Gitweb, install the highlight package and add
$feature{'highlight'}{'default'} = [1];. - To enable display remote heads, add
$feature{'remote_heads'}{'default'} = [1];.
Finally, go to http://localhost/gitweb to see your projects.
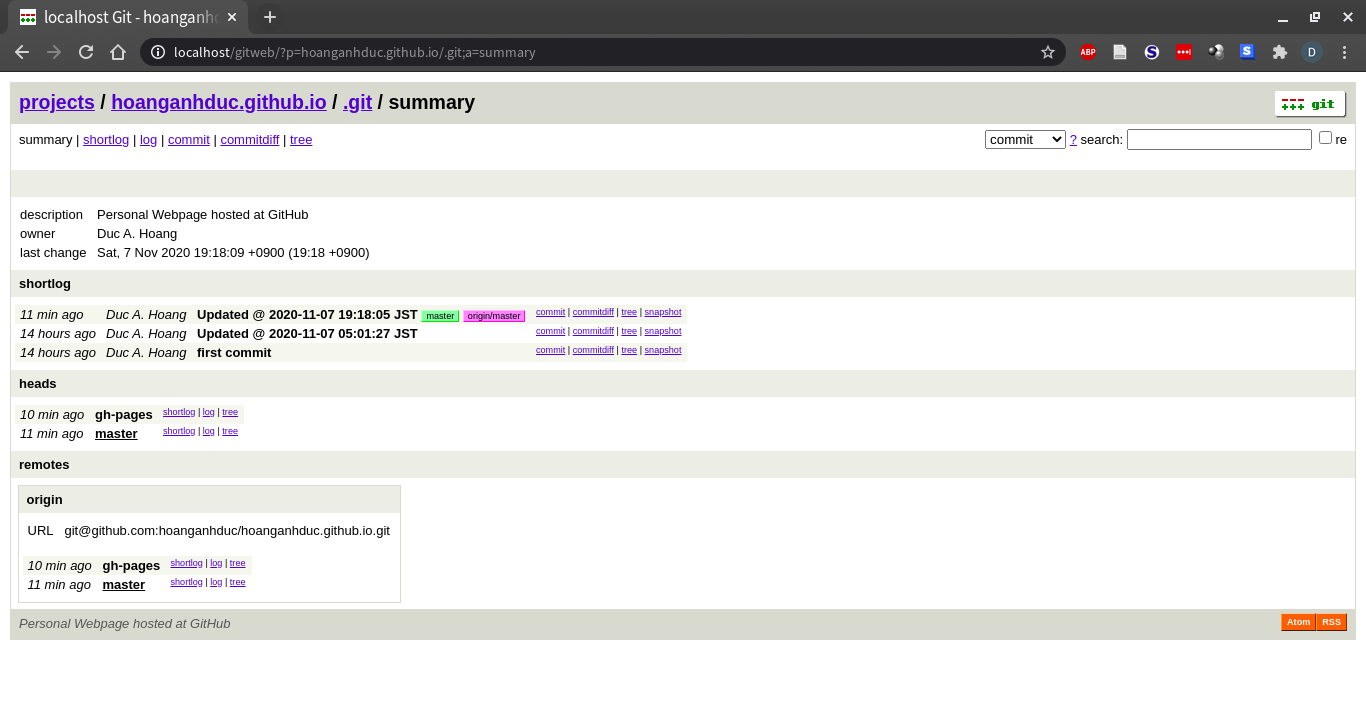
The repository of my personal webpage displayed locally by Gitweb
FTP with vsftpd
I follow the instruction from ArchWiki. Another good resource is this guide. To install, run
sudo pacman -S vsftpd
sudo systemctl enable vsftpd
Next, add the following lines to /etc/hosts.allow
# Allow all connections
vsftpd: ALL
# IP address range
vsftpd: 10.0.0.0/255.255.255.0
Then, edit /etc/vsftpd.conf to enable/disable certain options.
My vsftpd.conf looks like this
# Allow anonymous FTP? (Beware - allowed by default if you comment this out).
anonymous_enable=NO
# Uncomment this to allow local users to log in.
local_enable=YES
#
# Uncomment this to enable any form of FTP write command.
write_enable=YES
#
# Default umask for local users is 077. You may wish to change this to 022,
# if your users expect that (022 is used by most other ftpd's)
local_umask=022
#
# Uncomment this if you want the anonymous FTP user to be able to create
# new directories.
anon_mkdir_write_enable=YES
# Directory to be used for an anonymous login
anon_root=public
#
# Activate directory messages - messages given to remote users when they
# go into a certain directory.
dirmessage_enable=YES
#
# Activate logging of uploads/downloads.
xferlog_enable=YES
#
# Make sure PORT transfer connections originate from port 20 (ftp-data).
connect_from_port_20=YES
#
# When "listen" directive is enabled, vsftpd runs in standalone mode and
# listens on IPv4 sockets. This directive cannot be used in conjunction
# with the listen_ipv6 directive.
listen=YES
listen_port=21
passv_min_port=5000
passv_max_port=5003


# Set own PAM service name to detect authentication settings specified
# for vsftpd by the system package.
pam_service_name=vsftpd

ssl_enable=YES

# if you accept anonymous connections, you may want to enable this setting
allow_anon_ssl=NO

# by default all non anonymous logins and forced to use SSL to send and receive password and data, set to NO to allow non secure connections
force_local_logins_ssl=NO
force_local_data_ssl=NO

# provide the path of your certificate and of your private key
# note that both can be contained in the same file or in different files
rsa_cert_file=/etc/httpd/conf/localhost.crt
rsa_private_key_file=/etc/httpd/conf/localhost.key

# this setting is set to YES by default and requires all data connections exhibit session reuse which proves they know the secret of the control channel.
# this is more secure but is not supported by many FTP clients, set to NO for better compatibility
require_ssl_reuse=NO

seccomp_sandbox=NO
The last line seccomp_sandbox=NO is to avoid the following error message when using FileZilla.
Error:	GnuTLS error -15 in gnutls_record_recv: An unexpected TLS packet was received.
Error:	Could not read from socket: ECONNABORTED - Connection aborted
Error:	Disconnected from server
Note that localhost.crt and localhost.key come from the instruction in a previous section of this post regarding using TLS in Apache server.
And since I allow local user login, I also need sudo usermod -aG ftp $USER to allow myself to use FTP service.
In order to have both FTP and FTPS simultaneously, I create an extra configuration file /etc/vsftpd_ssl.conf with the above contents, and the file /etc/vsftpd.conf with almost the same content, except the part starting from ssl_enable=YES, and the listen_port=990.
(Port 21 is considered the default control connection port for FTP connections.
Port 990 is the accepted default control connection port for FTPS (implicit port).
Actually, you can change them to whatever ports you like.
See this page for more details on other wel-known ports and their corresponding system processes.)
Next, create /usr/lib/systemd/system/vsftpd_ssl.service with the following content
[Unit]
Description=vsftpd daemon with SSL/TLS
After=network.target

[Service]
ExecStart=/usr/bin/vsftpd /etc/vsftpd_ssl.conf
ExecReload=/bin/kill -HUP $MAINPID
KillMode=process

[Install]
WantedBy=multi-user.target
and sudo systemctl enable vsftpd_ssl && sudo systemctl start vsftpd_ssl.
Turn your PC into a webserver
After installing Apache and other stuff, you can turn your PC into a webserver.
- Maybe you first need to
sudo systemctl start httpdandsudo ufw allow http. - Get your public IP address with
dig +short myip.opendns.com @resolver1.opendns.com. - Point your domain to your public IP address. If you use dynamic IP address, No-IP may be a good choice. Create a No-IP account, get a new hostname, install the No-IP client software
yay -S noip, and runnoip2 -C -Y -c ~/.config/no-ip2.confto create the configuration file~/.config/no-ip2.conf(you will need your No-IP account’s username and password). After finishing configuration, simply runnoip2 -c ~/.config/no-ip2.confto run the software. - Configure your router with “port forwarding”, for example, like in this guide with a TP-LINK router.
oh-my-zsh does not apply themes
You may try to remove the grml-zsh-config package, as described here.
Automount NTFS USB drive with default Linux file permissions
I want to mount my NTFS USB drive with default Linux file permissions (i.e., 644 for files, and 755 for folders) every time I plug it in. A simple way to do it is to add the following lines to /etc/udisks2/mount_options.conf and then sudo systemctl restart udisks2.
[defaults]
ntfs_defaults=uid=$UID,gid=$GID,umask=0022,fmask=0133,windows_names
Copy contents of a file to clipboard
Install xclip and run
xclip -sel clip < file.txt
to copy the contents of file.txt to clipboard. See this page for some other things you can do with xclip.
IRC server
I created a simple IRC server with biltbee.
Basically, I have to yay -S bitlbee, then edit /etc/bitlbee/bitlbee.conf as instructed in the wiki, and finally sudo systemctl start bitlbee and maybe also sudo systemctl enable bitlbee. My bitlbee.conf file may look pretty much like
[settings]
RunMode = ForkDaemon
User = bitlbee

DaemonInterface = 0.0.0.0
DaemonPort = 6667
You can replace <your-password> by any password you like.
For an IRC client software, I use irssi (another option might be hexchat).
If you are not familiar with IRC, some basic IRC commands will probably be helpful.
It is also possible to setup bitlbee with Facebook using the bitlbee-facebook package (maybe this blog post has some useful information), and the “self_messages” setting seems to be interesting.
It is also useful to look at some bitlbee commands.
What I did for setting bitlbee-facebook may look something like
(Please ignore the part starting from the hashtag # sign, they are just my comments.
Additionally, after the first line, the command prompt starts after [...].)
Make sure that your Facebook does not use two-factor authentication.
irssi # start `irssi`
[(status)] /connect localhost
[(status)] /join &facebook # `creating &facebook channel`
[&facebook] account add facebook <your-fb-email> <your-fb-password>
[&facebook] account facebook on
[&facebook] account facebook set nick_source full_name
[&facebook] account facebook set nick_format %-@full_name
[&facebook] channel facebook set fill_by account
[&facebook] channel facebook set account facebook
[&facebook] register <your-password> # your secret password used to save and load account settings
[&facebook] save # next time, to load account settings, run `identify <your-password>`
Some tips with file timestamps
-
Comparing timestamps of two files. (Originally from this page.)
A simple way (comparing up to seconds) is
[ file1 -nt file2 ] && echo "file1 is newer than file2"To be more precise (comparing up to nanoseconds),
file1time=$(ls --time-style=+%s%N -l file1 | awk "{print(\$6)}") file2time=$(ls --time-style=+%s%N -l file2 | awk "{print(\$6)}") [ $file1time -gt $file2time ] && echo "file1 is newer than file2" -
Copy the timestamp of
src.filetodst.file. (Originally from this page.)You will need coreutils.
touch -d @$(stat -c "%Y" "src_file") "dst.file" -
Save and restore files’ created/modified timestamps. (Originally from this page.)
You will need perl.
# Save
find / -mount -print0 | perl -ne 'INIT{ $/ = "\0"; use File::stat;} chomp; my $s = stat($_); next unless $s; print $s->ctime . "/" . $s->mtime . "/" . $s->atime ."/$_\0"; ' > dates.dat

# Restore
cat dates.dat |  perl -ne 'INIT{ $/ = "\0";} chomp; m!^([0-9]+)/([0-9]+)/([0-9]+)/(.*)!s or next; my ($ct, $mt, $at, $f) = ($1, $2, $3, $4); utime $at, $mt, $f;'
Cleaning
See this guide for more details.
-
Clean package cache.
The script
paccacheis useful for cleaning cached packages saved at/var/cache/pacman/pkg/. To install, runsudo pacman -S pacman-contriband use
paccache -hto see available options. To clean all cached packages that are not currently installed, runsudo pacman -Sc. To clean all cached packages, runsudo pacman -Scc. The commandyay -Sccalso does that along with removing all cached AUR packages installed usingyay. -
Remove orphan packages that are not used by any program.
To list all unused packages, run
sudo pacman -Qtdq. To remove all of them, runsudo pacman -Rns $(pacman -Qtdq). -
Clean
$HOME/.cache.To check the size of the folder, run
du -sh $HOME/.cache/. To delete the folder, simply runrm -rf $HOME/.cache. -
Clean duplicates, empty files/folders, broken links.
Use rmlint. Run
rmlint $HOMEwill check your home directory for duplicated files and creates a shell scriptrmlint.shto remove them. -
Clean systemd journal stored at
/var/log/journal.You can keep only the latest logs by size limit (e.g. keep only 50MB of the latest logs):
sudo journalctl --vacuum-size=50MOr by time limit (e.g. last 4 weeks):
sudo journalctl --vacuum-time=4weeks
Quick Clonezilla commands
-
Save partitions
/dev/sdc1,/dev/sdc2,/dev/sdc3, and/dev/sdc4to image2020-10-25-03-img./usr/bin/ocs-sr -q2 -c -j2 -z1p -i 4096 -sfsck -senc -p choose saveparts 2020-10-25-03-img sdc1 sdc2 sdc3 sdc4 -
Restore
sdb4from image2020-10-25-03-imgto partition/dev/sda4on disk/usr/bin/ocs-sr -e1 auto -e2 -t -r -j2 -c -k -p choose -f sdb4 restoreparts 2020-10-25-03-img sda4Remeber to mount the directory containing
2020-10-25-03-imgas/home/partimagbefore running this command. -
Clone
/dev/sdb4to/dev/sda4./usr/bin/ocs-onthefly -e1 auto -e2 -r -j2 -sfsck -k -pa choose -f sdb4 -t sda4
[Live Arch] Adjust The Size of The Root Partition on Live Arch Linux
This is a quite useful tip when booting from Live Arch system to test your installation. Let say you want to use 1GB from your RAM as space for the root partition:
mount -o remount,size=1G /run/archiso/cowspace
Using df -h to confirm that the size of airootfs mounted on / is now 1.0G.
Mondo Rescue
Back in 2014, I used Mondo Rescue as an option for backing up and restoring my Ubuntu system.
Even though I am now using Clonezilla, I still want to have Mondo Rescue on my Arch Linux system.
So I went ahead and installed mondo with yay -S --noconfirm --needed mondo.
Unfortunately, as I am using gcc 10.2.0, the compilation failed:
/usr/bin/ld: ../../src/common/libmondo.a(libmondo-tools.o):(.bss+0x210): multiple definition of `g_mondo_home'; mondorestore.o:(.bss+0x0): first defined here
collect2: error: ld returned 1 exit status
make[3]: *** [Makefile:422: mondorestore] Error 1
I found a similar bug report but cannot understand what the solution is.
I decided to use an older version of gcc and try to compile again.
Downgrading gcc is not an option, as it would break the dependencies of some other packages I need.
I follow this instruction to temporarily change the default version of gcc and then I can install mondo successfully.
yay -S --needed --noconfirm gcc9 gcc9-libs
sudo ln -s $(which gcc-9) /usr/local/bin/gcc
hash -r
yay -S --needed --noconfirm mondo
sudo rm -rf /usr/local/bin/gcc
Error 12 when using zip -u in Makefile
When using zip with -u option in a Makefile, e.g., zip -u archive.zip *.pdf, it may happen that nothing changes and therefore archive.zip will not be updated.
In this case, zip returns exit code 12, meaning “zip has nothing to do”.
make may produce something like make: *** [Makefile:8: all] Error 12.
To avoid such error, you can possibly do:
zip -u archive.zip *.pdf || if [[ $$? -eq 12 ]]; then echo "Nothing changes!"; exit 0; fi
In a Linux terminal, you can use echo $? to get the exit code of a command.
The output 0 means the command is executed successfully.
In a Makefile, to get the exit code, we need an extra $.
Which package holds my program?
Let say I want to know which package holds latexmk, what I did is to run pacman -Qo latexmk, and the result was something like /usr/bin/latexmk is owned by texlive-core 2020.55416-1. Another way would be using the pkgfike package, which can be installed by sudo pacman -S --noconfirm --needed pkgfile && sudo pkgfile --update.
Some tips for using git
-
Create empty branch (see here).
git checkout --orphan empty-branch git rm -rf . git commit --allow-empty -m "root commit" git push origin empty-branch -
Save login credentials
git config --global credential.helper storeRemove
--globaloption if you only want to enable saving credentials for your repository. You only need to enter the credentials the first time you push/pull from the remote repository, and then they with be stored in~/.git-credentials.
Convert BibTeX to RIS
I need RIS format to import references to Zotero.
(Importing with BibTeX always convert math symbols between $...$ into HTML markups, which is not very nice.)
I use bibutils (installed by yay -S bibutils) as follows:
bib2xml file.bib > file.xml
xml2ris file.xnl > file.ris
Some useful packages involving LaTeX
- There are some AUR packages that install LaTeX Templates: latex-template-springer, latex-template-lipics.
- The arxiv-collector package provides a small Python script to collect LaTeX sources for upload to the arXiv.
Static HTML file index generator for Github Pages
Install the apindex package with yay. See this page for more details on how to use this program.
HiDPI Display Settings
Several settings can be found here. Here are some of my settings.
- GNOME text scaling:
gsettings set org.gnome.desktop.interface text-scaling-factor 1.2. - Q5t apps: For Zoom, edit
/usr/share/applications/Zoom.desktopby replacingExec=/usr/bin/zoom %UbyExec=env QT_AUTO_SCREEN_SCALE_FACTOR=1 /usr/bin/zoom %U. Similar tricks can be done with other Qt5 apps (such as Insync). - GRUB Bootloader: Add
GRUB_GFXMODE=1024x768x32,autoto/etc/default/grub. - Systemd Boot Loader Option: You will need the
terminus-fontpackage. After installing this font, addfbcon=font:TER16x32to your bootloader entry configuration file, which, in my case, is located at/boot/efi/loader/entries/arch.conf. More precisely, myarch.confwill look like:title Arch Linux linux /vmlinuz-linux initrd /initramfs-linux.img options cryptdevice=PARTUUID=<my-root-partition-partuuid>:luks_root root=/dev/mapper/luks_root rw fbcon=font:TER16x32 - TTY font: To change the console font, edit
/etc/vconsole.confby addingFONT=ter-p24n # other options are ter-p28n, ter-p32n - GNOME scaling: I first scale GNOME with scale factor 2 via
gsettings set org.gnome.desktop.interface scaling-factor 2(which is too big). Then, I usexrandrto scaling down: first, usexrandr --listmonitorsto identify my monitor, which iseDP-1, then usexrandr --output eDP-1 --scale 1.25x1.25to zoom out 1.25 times. If the UI is too big, increase the scale factor; otherwise, decrease it. To do this automatically every time you login, put/usr/bin/xrandr --output eDP-1 --scale 1.25x1.25to the~/.xprofilefile andchmod +x .xprofile. Another option may be using Wayland instead of Xorg.
Mobile Broadband
- Install
modemmanager,mobile-broadband-provider-info,usbutils,usb_modeswitch, as instructed here. You can also installmodem-manager-guiusingyay. -
Enable and start
ModemManagerservicesudo systemctl enable ModemManager sudo systemctl start ModemManager - A system restart might be necessary for
ModemManagerto detect the USB modem. - Enable
wwanwithnmcli radio wwan on. - The
vnstatpackage can be installed to monitor network traffic.
Drivers for HP Printer/Scanner/Fax Devices
You will need HP Linux Imaging and Printing.
yay -S hplip hplip-plugin
Drivers for Kyocera TASKalpha Printer
You will need kyocera-cups or kyocera_universal.
Drivers for Fujifilm Apeos C320 z Printer
As described here, you will need xerox-docucentre-driver.
Guake and Wayland
Guake terminal has some trouble with GNOME Wayland. To fix it, simply add a keyboard shortcut (e.g., F12) for the command guake-toggle, and set the value of apps/guake/keybindings/global/show-hide in dconf-editor as disabled.
Adwaita-Dark Theme and Solarized-Dark Highlighting Scheme in TeXstudio
- Install
texstudioand eitheradwaita-qtoradwaita-qt6(depending which Qt version (5 or 6) used bytexstudio) packages. - Open TeXstudio, choose
Options > Config TeXstudio..., in theAppearancesection of theGeneraltab, select the themeAdwaita-Dark, then clickOKand exit. - Edit
$HOME/.config/texstudio/texstudio.iniby adding the following lines to configure Solarized-Dark highlighting scheme (taken from here):[formatsDark] version=1.0 data\normal\priority=-1 data\normal\bold=false data\normal\italic=false data\normal\overline=false data\normal\underline=false data\normal\strikeout=false data\normal\waveUnderline=false data\normal\foreground=#839496 data\normal\fontFamily= data\normal\pointSize=0 data\normal\wrapAround=false data\background\priority=-1 data\background\bold=false data\background\italic=false data\background\overline=false data\background\underline=false data\background\strikeout=false data\background\waveUnderline=false data\background\background=#002b36 data\background\fontFamily= data\background\pointSize=0 data\background\wrapAround=false data\commentTodo\priority=-1 data\commentTodo\bold=false data\commentTodo\italic=false data\commentTodo\overline=false data\commentTodo\underline=false data\commentTodo\strikeout=false data\commentTodo\waveUnderline=false data\commentTodo\background=#073642 data\commentTodo\fontFamily= data\commentTodo\pointSize=0 data\commentTodo\wrapAround=false data\comment\priority=-1 data\comment\bold=false data\comment\italic=false data\comment\overline=false data\comment\underline=false data\comment\strikeout=false data\comment\waveUnderline=false data\comment\foreground=#6c71c4 data\comment\fontFamily= data\comment\pointSize=0 data\comment\wrapAround=false data\keyword\priority=-1 data\keyword\bold=false data\keyword\italic=false data\keyword\overline=false data\keyword\underline=false data\keyword\strikeout=false data\keyword\waveUnderline=false data\keyword\foreground=#2aa198 data\keyword\fontFamily= data\keyword\pointSize=0 data\keyword\wrapAround=false data\extra-keyword\priority=-1 data\extra-keyword\bold=false data\extra-keyword\italic=false data\extra-keyword\overline=false data\extra-keyword\underline=false data\extra-keyword\strikeout=false data\extra-keyword\waveUnderline=false data\extra-keyword\foreground=#268bd2 data\extra-keyword\fontFamily= data\extra-keyword\pointSize=0 data\extra-keyword\wrapAround=false data\math-keyword\priority=-1 data\math-keyword\bold=false data\math-keyword\italic=false data\math-keyword\overline=false data\math-keyword\underline=false data\math-keyword\strikeout=false data\math-keyword\waveUnderline=false data\math-keyword\foreground=#859900 data\math-keyword\fontFamily= data\math-keyword\pointSize=0 data\math-keyword\wrapAround=false data\link\priority=-1 data\link\bold=false data\link\italic=false data\link\overline=false data\link\underline=true data\link\strikeout=false data\link\waveUnderline=false data\link\foreground=#6c71c4 data\link\fontFamily= data\link\pointSize=0 data\link\wrapAround=false data\align-ampersand\priority=-1 data\align-ampersand\bold=true data\align-ampersand\italic=false data\align-ampersand\overline=false data\align-ampersand\underline=false data\align-ampersand\strikeout=false data\align-ampersand\waveUnderline=false data\align-ampersand\foreground=#dc322f data\align-ampersand\fontFamily= data\align-ampersand\pointSize=0 data\align-ampersand\wrapAround=false data\verbatim\priority=-1 data\verbatim\bold=false data\verbatim\italic=false data\verbatim\overline=false data\verbatim\underline=false data\verbatim\strikeout=false data\verbatim\waveUnderline=false data\verbatim\foreground=#b58900 data\verbatim\fontFamily= data\verbatim\pointSize=0 data\verbatim\wrapAround=false data\picture\priority=-1 data\picture\bold=false data\picture\italic=false data\picture\overline=false data\picture\underline=false data\picture\strikeout=false data\picture\waveUnderline=false data\picture\foreground=#859900 data\picture\fontFamily= data\picture\pointSize=0 data\picture\wrapAround=false data\braceMatch\priority=-1 data\braceMatch\bold=true data\braceMatch\italic=false data\braceMatch\overline=false data\braceMatch\underline=false data\braceMatch\strikeout=false data\braceMatch\waveUnderline=false data\braceMatch\foreground=#dc322f data\braceMatch\background=#073642 data\braceMatch\fontFamily= data\braceMatch\pointSize=0 data\braceMatch\wrapAround=false data\braceMismatch\priority=-1 data\braceMismatch\bold=true data\braceMismatch\italic=false data\braceMismatch\overline=false data\braceMismatch\underline=false data\braceMismatch\strikeout=false data\braceMismatch\waveUnderline=false data\braceMismatch\foreground=#073642 data\braceMismatch\background=#dc322f data\braceMismatch\fontFamily= data\braceMismatch\pointSize=0 data\braceMismatch\wrapAround=false data\search\priority=-1 data\search\bold=false data\search\italic=false data\search\overline=false data\search\underline=false data\search\strikeout=false data\search\waveUnderline=false data\search\foreground=#073642 data\search\background=#eee8d5 data\search\fontFamily= data\search\pointSize=0 data\search\wrapAround=false data\numbers\priority=-1 data\numbers\bold=false data\numbers\italic=false data\numbers\overline=false data\numbers\underline=false data\numbers\strikeout=false data\numbers\waveUnderline=false data\numbers\foreground=#2aa198 data\numbers\fontFamily= data\numbers\pointSize=0 data\numbers\wrapAround=false data\math-delimiter\priority=-1 data\math-delimiter\bold=false data\math-delimiter\italic=false data\math-delimiter\overline=false data\math-delimiter\underline=false data\math-delimiter\strikeout=false data\math-delimiter\waveUnderline=false data\math-delimiter\foreground=#dc322f data\math-delimiter\fontFamily= data\math-delimiter\pointSize=0 data\math-delimiter\wrapAround=false data\text\priority=-1 data\text\bold=false data\text\italic=false data\text\overline=false data\text\underline=false data\text\strikeout=false data\text\waveUnderline=false data\text\foreground=#dc322f data\text\fontFamily= data\text\pointSize=0 data\text\wrapAround=false data\escapeseq\priority=-1 data\escapeseq\bold=false data\escapeseq\italic=false data\escapeseq\overline=false data\escapeseq\underline=false data\escapeseq\strikeout=false data\escapeseq\waveUnderline=false data\escapeseq\foreground=#d33682 data\escapeseq\fontFamily= data\escapeseq\pointSize=0 data\escapeseq\wrapAround=false data\spellingMistake\priority=-1 data\spellingMistake\bold=false data\spellingMistake\italic=false data\spellingMistake\overline=false data\spellingMistake\underline=false data\spellingMistake\strikeout=false data\spellingMistake\waveUnderline=true data\spellingMistake\linescolor=#dc322f data\spellingMistake\fontFamily= data\spellingMistake\pointSize=0 data\spellingMistake\wrapAround=false data\wordRepetition\priority=-1 data\wordRepetition\bold=false data\wordRepetition\italic=false data\wordRepetition\overline=false data\wordRepetition\underline=false data\wordRepetition\strikeout=false data\wordRepetition\waveUnderline=true data\wordRepetition\linescolor=#859900 data\wordRepetition\fontFamily= data\wordRepetition\pointSize=0 data\wordRepetition\wrapAround=false data\wordRepetitionLongRange\priority=-1 data\wordRepetitionLongRange\bold=false data\wordRepetitionLongRange\italic=false data\wordRepetitionLongRange\overline=false data\wordRepetitionLongRange\underline=false data\wordRepetitionLongRange\strikeout=false data\wordRepetitionLongRange\waveUnderline=true data\wordRepetitionLongRange\linescolor=#b58900 data\wordRepetitionLongRange\fontFamily= data\wordRepetitionLongRange\pointSize=0 data\wordRepetitionLongRange\wrapAround=false data\badWord\priority=-1 data\badWord\bold=false data\badWord\italic=false data\badWord\overline=false data\badWord\underline=false data\badWord\strikeout=true data\badWord\waveUnderline=false data\badWord\linescolor=#d33682 data\badWord\fontFamily= data\badWord\pointSize=0 data\badWord\wrapAround=false data\grammarMistake\priority=-1 data\grammarMistake\bold=false data\grammarMistake\italic=false data\grammarMistake\overline=false data\grammarMistake\underline=false data\grammarMistake\strikeout=false data\grammarMistake\waveUnderline=true data\grammarMistake\linescolor=#6c71c4 data\grammarMistake\fontFamily= data\grammarMistake\pointSize=0 data\grammarMistake\wrapAround=false data\grammarMistakeSpecial1\priority=-1 data\grammarMistakeSpecial1\bold=false data\grammarMistakeSpecial1\italic=false data\grammarMistakeSpecial1\overline=false data\grammarMistakeSpecial1\underline=false data\grammarMistakeSpecial1\strikeout=false data\grammarMistakeSpecial1\waveUnderline=false data\grammarMistakeSpecial1\background=#2aa198 data\grammarMistakeSpecial1\fontFamily= data\grammarMistakeSpecial1\pointSize=0 data\grammarMistakeSpecial1\wrapAround=false data\grammarMistakeSpecial2\priority=-1 data\grammarMistakeSpecial2\bold=false data\grammarMistakeSpecial2\italic=false data\grammarMistakeSpecial2\overline=false data\grammarMistakeSpecial2\underline=false data\grammarMistakeSpecial2\strikeout=false data\grammarMistakeSpecial2\waveUnderline=false data\grammarMistakeSpecial2\background=#268bd2 data\grammarMistakeSpecial2\fontFamily= data\grammarMistakeSpecial2\pointSize=0 data\grammarMistakeSpecial2\wrapAround=false data\grammarMistakeSpecial3\priority=-1 data\grammarMistakeSpecial3\bold=false data\grammarMistakeSpecial3\italic=false data\grammarMistakeSpecial3\overline=false data\grammarMistakeSpecial3\underline=false data\grammarMistakeSpecial3\strikeout=false data\grammarMistakeSpecial3\waveUnderline=false data\grammarMistakeSpecial3\background=#859900 data\grammarMistakeSpecial3\fontFamily= data\grammarMistakeSpecial3\pointSize=0 data\grammarMistakeSpecial3\wrapAround=false data\grammarMistakeSpecial4\priority=-1 data\grammarMistakeSpecial4\bold=false data\grammarMistakeSpecial4\italic=false data\grammarMistakeSpecial4\overline=false data\grammarMistakeSpecial4\underline=false data\grammarMistakeSpecial4\strikeout=false data\grammarMistakeSpecial4\waveUnderline=false data\grammarMistakeSpecial4\background=#eee8d5 data\grammarMistakeSpecial4\fontFamily= data\grammarMistakeSpecial4\pointSize=0 data\grammarMistakeSpecial4\wrapAround=false data\latexSyntaxMistake\priority=-1 data\latexSyntaxMistake\bold=false data\latexSyntaxMistake\italic=false data\latexSyntaxMistake\overline=false data\latexSyntaxMistake\underline=false data\latexSyntaxMistake\strikeout=false data\latexSyntaxMistake\waveUnderline=true data\latexSyntaxMistake\background=#073642 data\latexSyntaxMistake\linescolor=#dc322f data\latexSyntaxMistake\fontFamily= data\latexSyntaxMistake\pointSize=0 data\latexSyntaxMistake\wrapAround=false data\temporaryCodeCompletion\priority=-1 data\temporaryCodeCompletion\bold=false data\temporaryCodeCompletion\italic=true data\temporaryCodeCompletion\overline=false data\temporaryCodeCompletion\underline=false data\temporaryCodeCompletion\strikeout=false data\temporaryCodeCompletion\waveUnderline=false data\temporaryCodeCompletion\foreground=#268bd2 data\temporaryCodeCompletion\fontFamily= data\temporaryCodeCompletion\pointSize=0 data\temporaryCodeCompletion\wrapAround=false data\environment\priority=-1 data\environment\bold=false data\environment\italic=true data\environment\overline=false data\environment\underline=false data\environment\strikeout=false data\environment\waveUnderline=false data\environment\foreground=#cb4b16 data\environment\fontFamily= data\environment\pointSize=0 data\environment\wrapAround=false data\referencePresent\priority=-1 data\referencePresent\bold=false data\referencePresent\italic=false data\referencePresent\overline=false data\referencePresent\underline=false data\referencePresent\strikeout=false data\referencePresent\waveUnderline=false data\referencePresent\foreground=#859900 data\referencePresent\fontFamily= data\referencePresent\pointSize=0 data\referencePresent\wrapAround=false data\referenceMissing\priority=-1 data\referenceMissing\bold=false data\referenceMissing\italic=false data\referenceMissing\overline=false data\referenceMissing\underline=false data\referenceMissing\strikeout=false data\referenceMissing\waveUnderline=true data\referenceMissing\foreground=#d33682 data\referenceMissing\fontFamily= data\referenceMissing\pointSize=0 data\referenceMissing\wrapAround=false data\referenceMultiple\priority=-1 data\referenceMultiple\bold=false data\referenceMultiple\italic=false data\referenceMultiple\overline=false data\referenceMultiple\underline=false data\referenceMultiple\strikeout=false data\referenceMultiple\waveUnderline=true data\referenceMultiple\foreground=#6c71c4 data\referenceMultiple\fontFamily= data\referenceMultiple\pointSize=0 data\referenceMultiple\wrapAround=false data\citationPresent\priority=-1 data\citationPresent\bold=false data\citationPresent\italic=false data\citationPresent\overline=false data\citationPresent\underline=false data\citationPresent\strikeout=false data\citationPresent\waveUnderline=false data\citationPresent\foreground=#859900 data\citationPresent\fontFamily= data\citationPresent\pointSize=0 data\citationPresent\wrapAround=false data\citationMissing\priority=-1 data\citationMissing\bold=false data\citationMissing\italic=false data\citationMissing\overline=false data\citationMissing\underline=false data\citationMissing\strikeout=false data\citationMissing\waveUnderline=true data\citationMissing\foreground=#d33682 data\citationMissing\fontFamily= data\citationMissing\pointSize=0 data\citationMissing\wrapAround=false data\packagePresent\priority=-1 data\packagePresent\bold=false data\packagePresent\italic=false data\packagePresent\overline=false data\packagePresent\underline=false data\packagePresent\strikeout=false data\packagePresent\waveUnderline=false data\packagePresent\foreground=#859900 data\packagePresent\fontFamily= data\packagePresent\pointSize=0 data\packagePresent\wrapAround=false data\packageMissing\priority=-1 data\packageMissing\bold=false data\packageMissing\italic=false data\packageMissing\overline=false data\packageMissing\underline=false data\packageMissing\strikeout=true data\packageMissing\waveUnderline=false data\packageMissing\foreground=#d33682 data\packageMissing\linescolor=#dc322f data\packageMissing\fontFamily= data\packageMissing\pointSize=0 data\packageMissing\wrapAround=false data\structure\priority=-1 data\structure\bold=false data\structure\italic=true data\structure\overline=false data\structure\underline=false data\structure\strikeout=false data\structure\waveUnderline=false data\structure\foreground=#d33682 data\structure\fontFamily= data\structure\pointSize=0 data\structure\wrapAround=false data\current\priority=-1 data\current\bold=false data\current\italic=false data\current\overline=false data\current\underline=false data\current\strikeout=false data\current\waveUnderline=false data\current\background=#073642 data\current\fontFamily= data\current\pointSize=0 data\current\wrapAround=false data\preedit\priority=-1 data\preedit\bold=false data\preedit\italic=false data\preedit\overline=false data\preedit\underline=false data\preedit\strikeout=false data\preedit\waveUnderline=false data\preedit\background=#fdf6e3 data\preedit\fontFamily= data\preedit\pointSize=0 data\preedit\wrapAround=false data\line%3Aerror\priority=-1 data\line%3Aerror\bold=false data\line%3Aerror\italic=false data\line%3Aerror\overline=false data\line%3Aerror\underline=false data\line%3Aerror\strikeout=false data\line%3Aerror\waveUnderline=false data\line%3Aerror\background=#ffaaaa data\line%3Aerror\fontFamily= data\line%3Aerror\pointSize=0 data\line%3Aerror\wrapAround=false data\line%3Awarning\priority=-1 data\line%3Awarning\bold=false data\line%3Awarning\italic=false data\line%3Awarning\overline=false data\line%3Awarning\underline=false data\line%3Awarning\strikeout=false data\line%3Awarning\waveUnderline=false data\line%3Awarning\background=#fdf6e3 data\line%3Awarning\fontFamily= data\line%3Awarning\pointSize=0 data\line%3Awarning\wrapAround=false data\line%3Abadbox\priority=-1 data\line%3Abadbox\bold=false data\line%3Abadbox\italic=false data\line%3Abadbox\overline=false data\line%3Abadbox\underline=false data\line%3Abadbox\strikeout=false data\line%3Abadbox\waveUnderline=false data\line%3Abadbox\background=#aaffff data\line%3Abadbox\fontFamily= data\line%3Abadbox\pointSize=0 data\line%3Abadbox\wrapAround=false data\selection\priority=-1 data\selection\bold=false data\selection\italic=false data\selection\overline=false data\selection\underline=false data\selection\strikeout=false data\selection\waveUnderline=false data\selection\background=#eee8d5 data\selection\fontFamily= data\selection\pointSize=0 data\selection\wrapAround=true data\replacement\priority=-1 data\replacement\bold=false data\replacement\italic=false data\replacement\overline=false data\replacement\underline=false data\replacement\strikeout=false data\replacement\waveUnderline=false data\replacement\background=#dc322f data\replacement\fontFamily= data\replacement\pointSize=0 data\replacement\wrapAround=false data\sweave-delimiter\priority=-1 data\sweave-delimiter\bold=false data\sweave-delimiter\italic=true data\sweave-delimiter\overline=false data\sweave-delimiter\underline=false data\sweave-delimiter\strikeout=false data\sweave-delimiter\waveUnderline=false data\sweave-delimiter\foreground=#268bd2 data\sweave-delimiter\fontFamily= data\sweave-delimiter\pointSize=0 data\sweave-delimiter\wrapAround=false data\pweave-block\priority=-1 data\pweave-block\bold=false data\pweave-block\italic=false data\pweave-block\overline=false data\pweave-block\underline=false data\pweave-block\strikeout=false data\pweave-block\waveUnderline=false data\pweave-block\foreground=#b58900 data\pweave-block\fontFamily= data\pweave-block\pointSize=0 data\pweave-block\wrapAround=false data\pweave-delimiter\priority=-1 data\pweave-delimiter\bold=false data\pweave-delimiter\italic=true data\pweave-delimiter\overline=false data\pweave-delimiter\underline=false data\pweave-delimiter\strikeout=false data\pweave-delimiter\waveUnderline=false data\pweave-delimiter\foreground=#268bd2 data\pweave-delimiter\fontFamily= data\pweave-delimiter\pointSize=0 data\pweave-delimiter\wrapAround=false data\sweave-block\priority=-1 data\sweave-block\bold=false data\sweave-block\italic=false data\sweave-block\overline=false data\sweave-block\underline=false data\sweave-block\strikeout=false data\sweave-block\waveUnderline=false data\sweave-block\foreground=#b58900 data\sweave-block\fontFamily= data\sweave-block\pointSize=0 data\sweave-block\wrapAround=false data\replacement\foreground=#073642 data\previewSelection\priority=-1 data\previewSelection\bold=false data\previewSelection\italic=false data\previewSelection\overline=false data\previewSelection\underline=false data\previewSelection\strikeout=false data\previewSelection\waveUnderline=false data\previewSelection\foreground=#fdf6e3 data\previewSelection\background=#d33682 data\previewSelection\fontFamily= data\previewSelection\pointSize=0 data\previewSelection\wrapAround=true data\dtx%3Aguard\priority=-1 data\dtx%3Aguard\bold=false data\dtx%3Aguard\italic=false data\dtx%3Aguard\overline=false data\dtx%3Aguard\underline=false data\dtx%3Aguard\strikeout=false data\dtx%3Aguard\waveUnderline=false data\dtx%3Aguard\foreground=#b58900 data\dtx%3Aguard\fontFamily= data\dtx%3Aguard\pointSize=0 data\dtx%3Aguard\wrapAround=false data\dtx%3Amacro\priority=-1 data\dtx%3Amacro\bold=true data\dtx%3Amacro\italic=false data\dtx%3Amacro\overline=false data\dtx%3Amacro\underline=false data\dtx%3Amacro\strikeout=false data\dtx%3Amacro\waveUnderline=false data\dtx%3Amacro\foreground=#dc322f data\dtx%3Amacro\fontFamily= data\dtx%3Amacro\pointSize=0 data\dtx%3Amacro\wrapAround=false data\dtx%3Averbatim\priority=-1 data\dtx%3Averbatim\bold=false data\dtx%3Averbatim\italic=false data\dtx%3Averbatim\overline=false data\dtx%3Averbatim\underline=false data\dtx%3Averbatim\strikeout=false data\dtx%3Averbatim\waveUnderline=false data\dtx%3Averbatim\foreground=#6c71c4 data\dtx%3Averbatim\fontFamily= data\dtx%3Averbatim\pointSize=0 data\dtx%3Averbatim\wrapAround=false data\dtx%3Aspecialchar\priority=-1 data\dtx%3Aspecialchar\bold=false data\dtx%3Aspecialchar\italic=false data\dtx%3Aspecialchar\overline=false data\dtx%3Aspecialchar\underline=false data\dtx%3Aspecialchar\strikeout=false data\dtx%3Aspecialchar\waveUnderline=false data\dtx%3Aspecialchar\foreground=#d33682 data\dtx%3Aspecialchar\fontFamily= data\dtx%3Aspecialchar\pointSize=0 data\dtx%3Aspecialchar\wrapAround=false data\dtx%3Acommands\priority=-1 data\dtx%3Acommands\bold=false data\dtx%3Acommands\italic=true data\dtx%3Acommands\overline=false data\dtx%3Acommands\underline=false data\dtx%3Acommands\strikeout=false data\dtx%3Acommands\waveUnderline=false data\dtx%3Acommands\foreground=#268bd2 data\dtx%3Acommands\fontFamily= data\dtx%3Acommands\pointSize=0 data\dtx%3Acommands\wrapAround=false data\lua%3Akeyword\priority=-1 data\lua%3Akeyword\bold=false data\lua%3Akeyword\italic=false data\lua%3Akeyword\overline=false data\lua%3Akeyword\underline=false data\lua%3Akeyword\strikeout=false data\lua%3Akeyword\waveUnderline=false data\lua%3Akeyword\foreground=#b58900 data\lua%3Akeyword\fontFamily= data\lua%3Akeyword\pointSize=0 data\lua%3Akeyword\wrapAround=false data\lua%3Acomment\priority=-1 data\lua%3Acomment\bold=false data\lua%3Acomment\italic=false data\lua%3Acomment\overline=false data\lua%3Acomment\underline=false data\lua%3Acomment\strikeout=false data\lua%3Acomment\waveUnderline=false data\lua%3Acomment\foreground=#657b83 data\lua%3Acomment\fontFamily= data\lua%3Acomment\pointSize=0 data\lua%3Acomment\wrapAround=false data\asymptote%3Ablock\priority=-1 data\asymptote%3Ablock\bold=false data\asymptote%3Ablock\italic=false data\asymptote%3Ablock\overline=false data\asymptote%3Ablock\underline=false data\asymptote%3Ablock\strikeout=false data\asymptote%3Ablock\waveUnderline=false data\asymptote%3Ablock\foreground=#b58900 data\asymptote%3Ablock\fontFamily= data\asymptote%3Ablock\pointSize=0 data\asymptote%3Ablock\wrapAround=false data\asymptote%3Akeyword\priority=-1 data\asymptote%3Akeyword\bold=false data\asymptote%3Akeyword\italic=false data\asymptote%3Akeyword\overline=false data\asymptote%3Akeyword\underline=false data\asymptote%3Akeyword\strikeout=false data\asymptote%3Akeyword\waveUnderline=false data\asymptote%3Akeyword\foreground=#6c71c4 data\asymptote%3Akeyword\fontFamily= data\asymptote%3Akeyword\pointSize=0 data\asymptote%3Akeyword\wrapAround=false data\asymptote%3Atype\priority=-1 data\asymptote%3Atype\bold=false data\asymptote%3Atype\italic=false data\asymptote%3Atype\overline=false data\asymptote%3Atype\underline=false data\asymptote%3Atype\strikeout=false data\asymptote%3Atype\waveUnderline=false data\asymptote%3Atype\foreground=#2aa198 data\asymptote%3Atype\fontFamily= data\asymptote%3Atype\pointSize=0 data\asymptote%3Atype\wrapAround=false data\asymptote%3Anumbers\priority=-1 data\asymptote%3Anumbers\bold=false data\asymptote%3Anumbers\italic=false data\asymptote%3Anumbers\overline=false data\asymptote%3Anumbers\underline=false data\asymptote%3Anumbers\strikeout=false data\asymptote%3Anumbers\waveUnderline=false data\asymptote%3Anumbers\foreground=#859900 data\asymptote%3Anumbers\fontFamily= data\asymptote%3Anumbers\pointSize=0 data\asymptote%3Anumbers\wrapAround=false data\asymptote%3Astring\priority=-1 data\asymptote%3Astring\bold=false data\asymptote%3Astring\italic=false data\asymptote%3Astring\overline=false data\asymptote%3Astring\underline=false data\asymptote%3Astring\strikeout=false data\asymptote%3Astring\waveUnderline=false data\asymptote%3Astring\foreground=#268bd2 data\asymptote%3Astring\fontFamily= data\asymptote%3Astring\pointSize=0 data\asymptote%3Astring\wrapAround=false data\asymptote%3Acomment\priority=-1 data\asymptote%3Acomment\bold=false data\asymptote%3Acomment\italic=false data\asymptote%3Acomment\overline=false data\asymptote%3Acomment\underline=false data\asymptote%3Acomment\strikeout=false data\asymptote%3Acomment\waveUnderline=false data\asymptote%3Acomment\foreground=#657b83 data\asymptote%3Acomment\fontFamily= data\asymptote%3Acomment\pointSize=0 data\asymptote%3Acomment\wrapAround=false data\picture-keyword\priority=-1 data\picture-keyword\bold=false data\picture-keyword\italic=false data\picture-keyword\overline=false data\picture-keyword\underline=false data\picture-keyword\strikeout=false data\picture-keyword\waveUnderline=false data\picture-keyword\foreground=#cb4b16 data\picture-keyword\fontFamily= data\picture-keyword\pointSize=0 data\picture-keyword\wrapAround=false data\diffDelete\priority=-1 data\diffDelete\bold=false data\diffDelete\italic=false data\diffDelete\overline=false data\diffDelete\underline=false data\diffDelete\strikeout=true data\diffDelete\waveUnderline=false data\diffDelete\background=#ffaaff data\diffDelete\fontFamily= data\diffDelete\pointSize=0 data\diffDelete\wrapAround=false data\diffAdd\priority=-1 data\diffAdd\bold=false data\diffAdd\italic=false data\diffAdd\overline=false data\diffAdd\underline=false data\diffAdd\strikeout=false data\diffAdd\waveUnderline=false data\diffAdd\background=#aaff7f data\diffAdd\fontFamily= data\diffAdd\pointSize=0 data\diffAdd\wrapAround=false data\qtscript%3Acomment\priority=-1 data\qtscript%3Acomment\bold=false data\qtscript%3Acomment\italic=false data\qtscript%3Acomment\overline=false data\qtscript%3Acomment\underline=false data\qtscript%3Acomment\strikeout=false data\qtscript%3Acomment\waveUnderline=false data\qtscript%3Acomment\foreground=#657b83 data\qtscript%3Acomment\fontFamily= data\qtscript%3Acomment\pointSize=0 data\qtscript%3Acomment\wrapAround=false data\qtscript%3Astring\priority=-1 data\qtscript%3Astring\bold=false data\qtscript%3Astring\italic=false data\qtscript%3Astring\overline=false data\qtscript%3Astring\underline=false data\qtscript%3Astring\strikeout=false data\qtscript%3Astring\waveUnderline=false data\qtscript%3Astring\foreground=#859900 data\qtscript%3Astring\fontFamily= data\qtscript%3Astring\pointSize=0 data\qtscript%3Astring\wrapAround=false data\qtscript%3Anumber\priority=-1 data\qtscript%3Anumber\bold=false data\qtscript%3Anumber\italic=false data\qtscript%3Anumber\overline=false data\qtscript%3Anumber\underline=false data\qtscript%3Anumber\strikeout=false data\qtscript%3Anumber\waveUnderline=false data\qtscript%3Anumber\foreground=#268bd2 data\qtscript%3Anumber\fontFamily= data\qtscript%3Anumber\pointSize=0 data\qtscript%3Anumber\wrapAround=false data\qtscript%3Akeyword\priority=-1 data\qtscript%3Akeyword\bold=false data\qtscript%3Akeyword\italic=false data\qtscript%3Akeyword\overline=false data\qtscript%3Akeyword\underline=false data\qtscript%3Akeyword\strikeout=false data\qtscript%3Akeyword\waveUnderline=false data\qtscript%3Akeyword\foreground=#b58900 data\qtscript%3Akeyword\fontFamily= data\qtscript%3Akeyword\pointSize=0 data\qtscript%3Akeyword\wrapAround=false data\qtscript%3Atxs-variable\priority=-1 data\qtscript%3Atxs-variable\bold=false data\qtscript%3Atxs-variable\italic=false data\qtscript%3Atxs-variable\overline=false data\qtscript%3Atxs-variable\underline=false data\qtscript%3Atxs-variable\strikeout=false data\qtscript%3Atxs-variable\waveUnderline=false data\qtscript%3Atxs-variable\foreground=#dc322f data\qtscript%3Atxs-variable\fontFamily= data\qtscript%3Atxs-variable\pointSize=0 data\qtscript%3Atxs-variable\wrapAround=false data\magicComment\priority=-1 data\magicComment\bold=false data\magicComment\italic=false data\magicComment\overline=false data\magicComment\underline=false data\magicComment\strikeout=false data\magicComment\waveUnderline=false data\magicComment\foreground=#586e75 data\magicComment\fontFamily= data\magicComment\pointSize=0 data\magicComment\wrapAround=false
Hiding output of a command
command > /dev/null 2>&1
Finding files having certain string in their names and rename them
For example, see this page.
I have some files in different folders which all contain the same string, say xxyyzz, in their filenames. I want to remove all such strings in their filenames. Here is how I did it:
find ./ -name "*xxyyzz*" | while read file; do mv $file "${file/xxyyzz/}"; done
Change default user directories
Edit $HOME/.config/user-dirs.dirs. In my case, the content of this file is as follows.
XDG_DESKTOP_DIR="$HOME/Desktop"
XDG_DOWNLOAD_DIR="$HOME/Downloads"
XDG_TEMPLATES_DIR="$HOME/Templates"
XDG_PUBLICSHARE_DIR="$HOME/Public"
XDG_DOCUMENTS_DIR="$HOME/Documents"
XDG_MUSIC_DIR="$HOME/Music"
XDG_PICTURES_DIR="$HOME/Pictures"
XDG_VIDEOS_DIR="$HOME/Videos"
power-profiles-daemon package conflicts with TLP
I want to use TLP. To avoid confliction, sudo systemctl mask power-profiles-daemon.
Mailnag
Mailnag is a daemon program that checks POP3 and IMAP servers for new mail.
yay -S mailnag mailnag-gnome-shell
If you are using GNOME 41 and the mail indicator of mailnag-gnome-shell does not show up in the top panel, just edit /usr/share/gnome-shell/extensions/mailnag@pulb.github.com/metadata.json and add 41 to the list, as described here.
...
"shell-version": ["40", "41"],
...
Configure nano text editor
Create a $HOME/.nanorc file with the following content. More configurations can be found here. You can also directly edit /etc/nanorc to make your configuration apply for all users.
include /usr/share/nano/*.nanorc
set linenumbers
set mouse
set tabsize 4
set softwrap
set autoindent
set regexp
Pop Shell
See this page for more details on how to use Pop Shell. From its GitHub page:
Pop Shell is a keyboard-driven layer for GNOME Shell which allows for quick and sensible navigation and management of windows. The core feature of Pop Shell is the addition of advanced tiling window management---a feature that has been highly sought within our community. For many---ourselves included---i3wm has become the leading competitor to the GNOME desktop.
In Arch Linux, you can install it by running
yay -S gnome-shell-extension-pop-shell- For precompiled binary version:
yay -S gnome-shell-extension-pop-shell-bin - For GitHub repository version:
yay -S gnome-shell-extension-pop-shell-git
Enable Hibernation into swap file
For more details, see this guide.
Using a swap file requires also setting the resume=swap_device and additionally a resume_offset=swap_file_offset kernel parameters. swap_device is the volume where the swap file resides and it follows the same format as for the root parameter. The value of swap_file_offset can be obtained by running filefrag -v swap_file, the output is in a table format and the required value is located in the first row of the physical_offset column. For example, if the output of filefrag -v swap_file is:
Filesystem type is: ef53
File size of /swapfile is 4294967296 (1048576 blocks of 4096 bytes)
 ext:     logical_offset:        physical_offset: length:   expected: flags:
   0:        0..       0:      38912..     38912:      1:
   1:        1..   22527:      38913..     61439:  22527:             unwritten
   2:    22528..   53247:     899072..    929791:  30720:      61440: unwritten
...
the value of swap_file_offset is 38912. Another way to obtain swap_file_offset is to install uswsusp and run swap-offset swapfile.
Next, we need to configure the initramfs.
When an initramfs with the base hook is used, which is the default, the resume hook is required in /etc/mkinitcpio.conf. Whether by label or by UUID, the swap partition is referred to with a udev device node, so the resume hook must go after the udev hook. This example was made starting from the default hook configuration:
HOOKS=(base udev autodetect keyboard modconf block filesystems resume fsck)
Remember to regenerate the initramfs for these changes to take effect. To test if hibernation works, run systemctl hibernate.
BigBlueButton Presentation Renderer
We use the bbb-render tool this page, which requires the intervaltree and PyGObject python libraries and optionally the pitivi package.
The BigBlueButton web conferencing system provides the ability to record meetings. Rather than producing a single video file though, it produces multiple assets (webcam footage, screenshare footage, slides, scribbles, chat, etc) and relies on a web player to assemble them. This project provides some scripts to download the assets for a recorded presentation, and assemble them into a single video suitable for archive or upload to other video hosting sites.
Import history from Vivaldi
We use the same idea described in this page. In Arch Linux, Vivaldi’s history is stored at $HOME/.config/vivaldi/Default/, and just simply copy History and History-journal to the folder $HOME/.config/google-chrome/Default where Google Chrome’s history is stored. Since Vivaldi and Chrome are all Chromium-based browsers, their histories are pretty much interchangeable. Then, if you want to import the history to Firefox, you can now import it from Google Chrome instead of Vivaldi.